Developing with Inverse3
This article builds on the quick-start guide and serves as an introduction to the Inverse3 as a haptic development tool. To this end, it discusses various hardware configurations, methods of control, and key features that change the behaviour of the device.
Device Handedness and Coordinate System
The Inverse3 has two hardware configurations which are optimised for different scenarios.
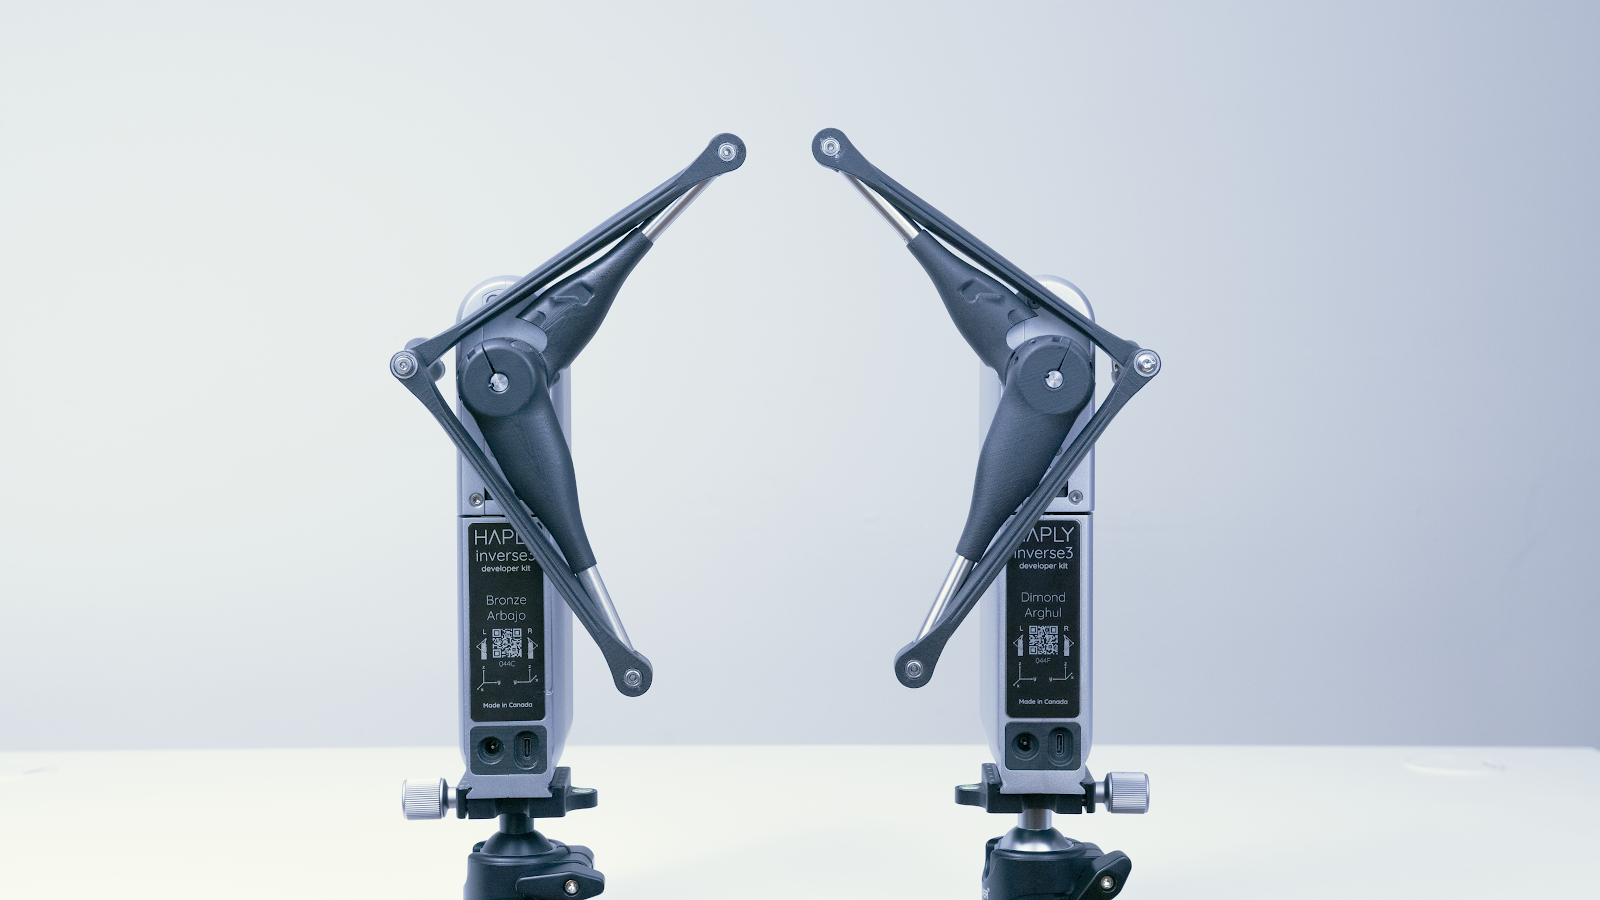
Each device can be used by either left or right-handed users, but right-handed users may find right-handed configured devices easier to use in some situations.
Using two devices together in a bimanual scenario, the left-handed device should be placed on the left side and right-handed device on the right to minimise collisions and interference.
Both devices follow a right-handed coordinate system shown on the device plaques located on the arm side of the Inverse3. The coordinate system origin is located on the flat face of the device’s mounting plate, near the centre.
Check the InverseSDK documentation for the language or plugin you plan to use as the coordinate system provided in the SDKs may already follow the game engine specific coordinate system.
Controlling the Inverse3
Control of the Inverse3 is not limited to the control of forces; it is also possible to control its joint torques and angles. This section outlines the various control modes, and the relevant inputs and outputs with their respective units.
Using either mode comes with intrinsic risks to both users and the device, for safety information see Inverse3 Safe Use.
Cartesian Control
Force control is the preferred method for using Inverse3 as it takes force in newtons (N), and returns its position in meters (m) and velocity in meters per second (m/s). In position control mode the Inverse3 moves and maintains a specified position. Switching between the two modes is seamless which means that they can be used together to provide a better user experience. For example, the device can be moved away from interactable objects at the start of a simulation or, with use of a tracked VerseGrip, position control mode can hold the cursor’s position when switching tools.
Joint Control
Analogously, Inverse3 joint torques and angles can be controlled directly. In torque control mode the device will generate torque specified in newtons per millimeters (N·mm) and in joint angle control it will move to an angle specified in degrees (°). In either case, the device returns its position in ° and velocity in degrees per second (°/s).
Colour Codes
The Haply logo status light changes colour based on the device’s operating mode. The table shows the status light colours for the latest firmware (For colours in previous firmware versions see Legacy Status Light Colours section below)
| Colour | Light sequence | State | Description |
|---|---|---|---|
| Off | Off | Unplugged | USB-C cable is disconnected |
| Red | Blink | No handshake | No connection to the service established |
| SOS Blink | Timeout | Communication timeout detected, no commands received from the service | |
| Yellow | Blink | Uncalibrated & unpowered | Power adapter disconnected and calibration required |
| Fade in/out | Uncalibrated | Device calibration required | |
| White | Solid | Idle | No control mode active |
| Blink | Idle & unpowered | Power adapter disconnected and no control mode active | |
| Green | Solid | Force control | Device active in force control mode |
| Blink | Force control & unpowered | Power adapter disconnected and device in force control mode | |
| Cyan | Solid | Position control | Device active in position control mode |
| Blink | Position control & unpowered | Power adapter disconnected and device in position control mode | |
| Orange | Solid | Safety trigger | Instability has been detected, safety trigger has been activated |
Note: If the status light remains red, your USB may be failing to pass data. Ensure that the connections are secure, or swap out your cable. If your status light doesn’t fall into the expected patterns, please submit a support request.
Optional Performance Improvement Features
Inverse3 has multiple features that aim to provide control over its performance and feel. This section provides a brief overview of these features and their use.
Velocity Estimation
Velocity is not measured directly, but derived from position data, which can result in noisy and inaccurate signals that require filtering. The Inverse3 features an onboard velocity estimation algorithm that leverages its integrated hardware to produce a velocity signal that does not require additional filtering.
Please note that the velocity estimate is approximate and may not be fully accurate. Its performance and accuracy may be refined as improvements are made.
Gravity Compensation
Gravity compensation eliminates the forces resulting from the mass of the Inverse3’s components making it feel weightless irrespective of mounting orientation. At the start of a simulation the device uses an onboard sensor to calibrate the algorithm; changing the device orientation during operation will lead to erratic behaviour.
Gravity compensation only works in force control mode.

The gravity compensation strength is adjustable using a gravity scaling factor (set to 0.75 by default) and it can be turned off all together using SDK-specific commands (see the SDK reference for details) .
Force Scaling
The Inverse3 generates different force magnitudes in different directions. As a result, trying to generate a force that exceeds Inverse3’s capabilities can result in a force with a different direction to the desired force. Enabling force scaling preserves the direction of the force but lowers its magnitude. This feature is turned on by default, but it can be disabled using the SDK-specific commands.
VerseGrip Orientation Tracking
Tracking tool orientation with the Inverse3 requires a VerseGrip.
Learn more about the VerseGrips in the Getting started: VerseGrip article.
Legacy Status Lights
Firmware 7.4.x and below
| Colour | Light sequence | State | Description |
|---|---|---|---|
| Off | Off | Unplugged | USB-C cable is disconnected |
| Red | Blink | No handshake | No connection to the service established |
| Purple | Solid | Uncalibrated | Device calibration required |
| Blink | Uncalibrated & unpowered | Power adapter disconnected and calibration required | |
| White | Solid | Idle | No control mode active |
| Blink | Idle & unpowered | Power adapter disconnected and no control mode active | |
| Green | Solid | Force control | Device active in force control mode |
| Blink | Force control & unpowered | Power adapter disconnected and device in force control mode | |
| Royal blue | Solid | Position control | Device active in position control mode |
| Blink | Position control & unpowered | Power adapter disconnected and device in position control mode | |
| Cyan | Solid | Damping safety | Velocity/force damping safety triggered |
| Pink | Solid | Stabitlity ceiling | Repeated instabilities, force limit ceiling ha sbeen reduced |
| Violet | Solid | Stability assist triggered | Instability detected, force is ramped down automatically |
| Orange | Solid | Emergency brake | Immediate stop, emergency brake is active |
| Yellow | Fast blink | Timeout | Communication timeout detected |