import CTA from '/src/theme/MDXComponents/CTA' import HH from '../media/haply-hub.png'
Getting started with the Inverse3
This article provides instructions on basic operation, calibration, and the connection of accessories for the Inverse3. By the end, you will be well-equipped to operate the device and try a pre-made haptic simulation.
What's in the box?

The box contains: a VerseGrip (1), the Inverse3 (2), two USB-C cables (3), and a power supply (4); the VerseMount Clamp (5) comes in a separate box. The Inverse3 has 4 components relevant to this article: a status light (A), a gimbal (B), arms (C), and a foot (D).
The included power supply supports 100V - 240V. The accompanying power cable can be replaced with any cable that has a IEC C13 connector to support your country’s wall socket type. Please do not replace the power supply itself as this may void your warranty. Contact us with any questions.
Inverse3 Setup
This section outlines the steps of mounting the Inverse3 to a table, folding and unfolding the arms, and calibration.
Mounting the Inverse3
Start by attaching the VerseMount Clamp to a flat, level, sturdy surface preferably within comfortable reach of your dominant hand. Make sure that the bottom knob holding the clamp is firmly tightened and that it will not easily move.

Mount the Inverse3 to the desk clamp by sliding the foot of the Inverse3 into the desk clamp and tightening the mounting plate.

Before starting-up, the device should be fully perpendicular to the ground.
Inverse3 uses a standard Arca-Swiss mounting system which means that you can design your own attachment.
Folding and Unfolding Arms
The Inverse3's arms are designed to fold away when not in use, protecting them from accidental damage and making the device easier to pack up and move around.
- Use one hand to pull the arms towards you until they feel taught, then use your free hand to press the arms together such that they are in-line with each other.
- Next, fold the arms in against the body of the Inverse3. You should feel the side-lock catch and lock them into place.
- Finally, fold the ends of the arms against the body of the device. You should feel the tool attachment snap to the casing.

Essential software
Download the Haply Hub and install it to your computer. This app will act as a driver for your new Inverse3, as well as an essential tool in visualization and feature exploration.
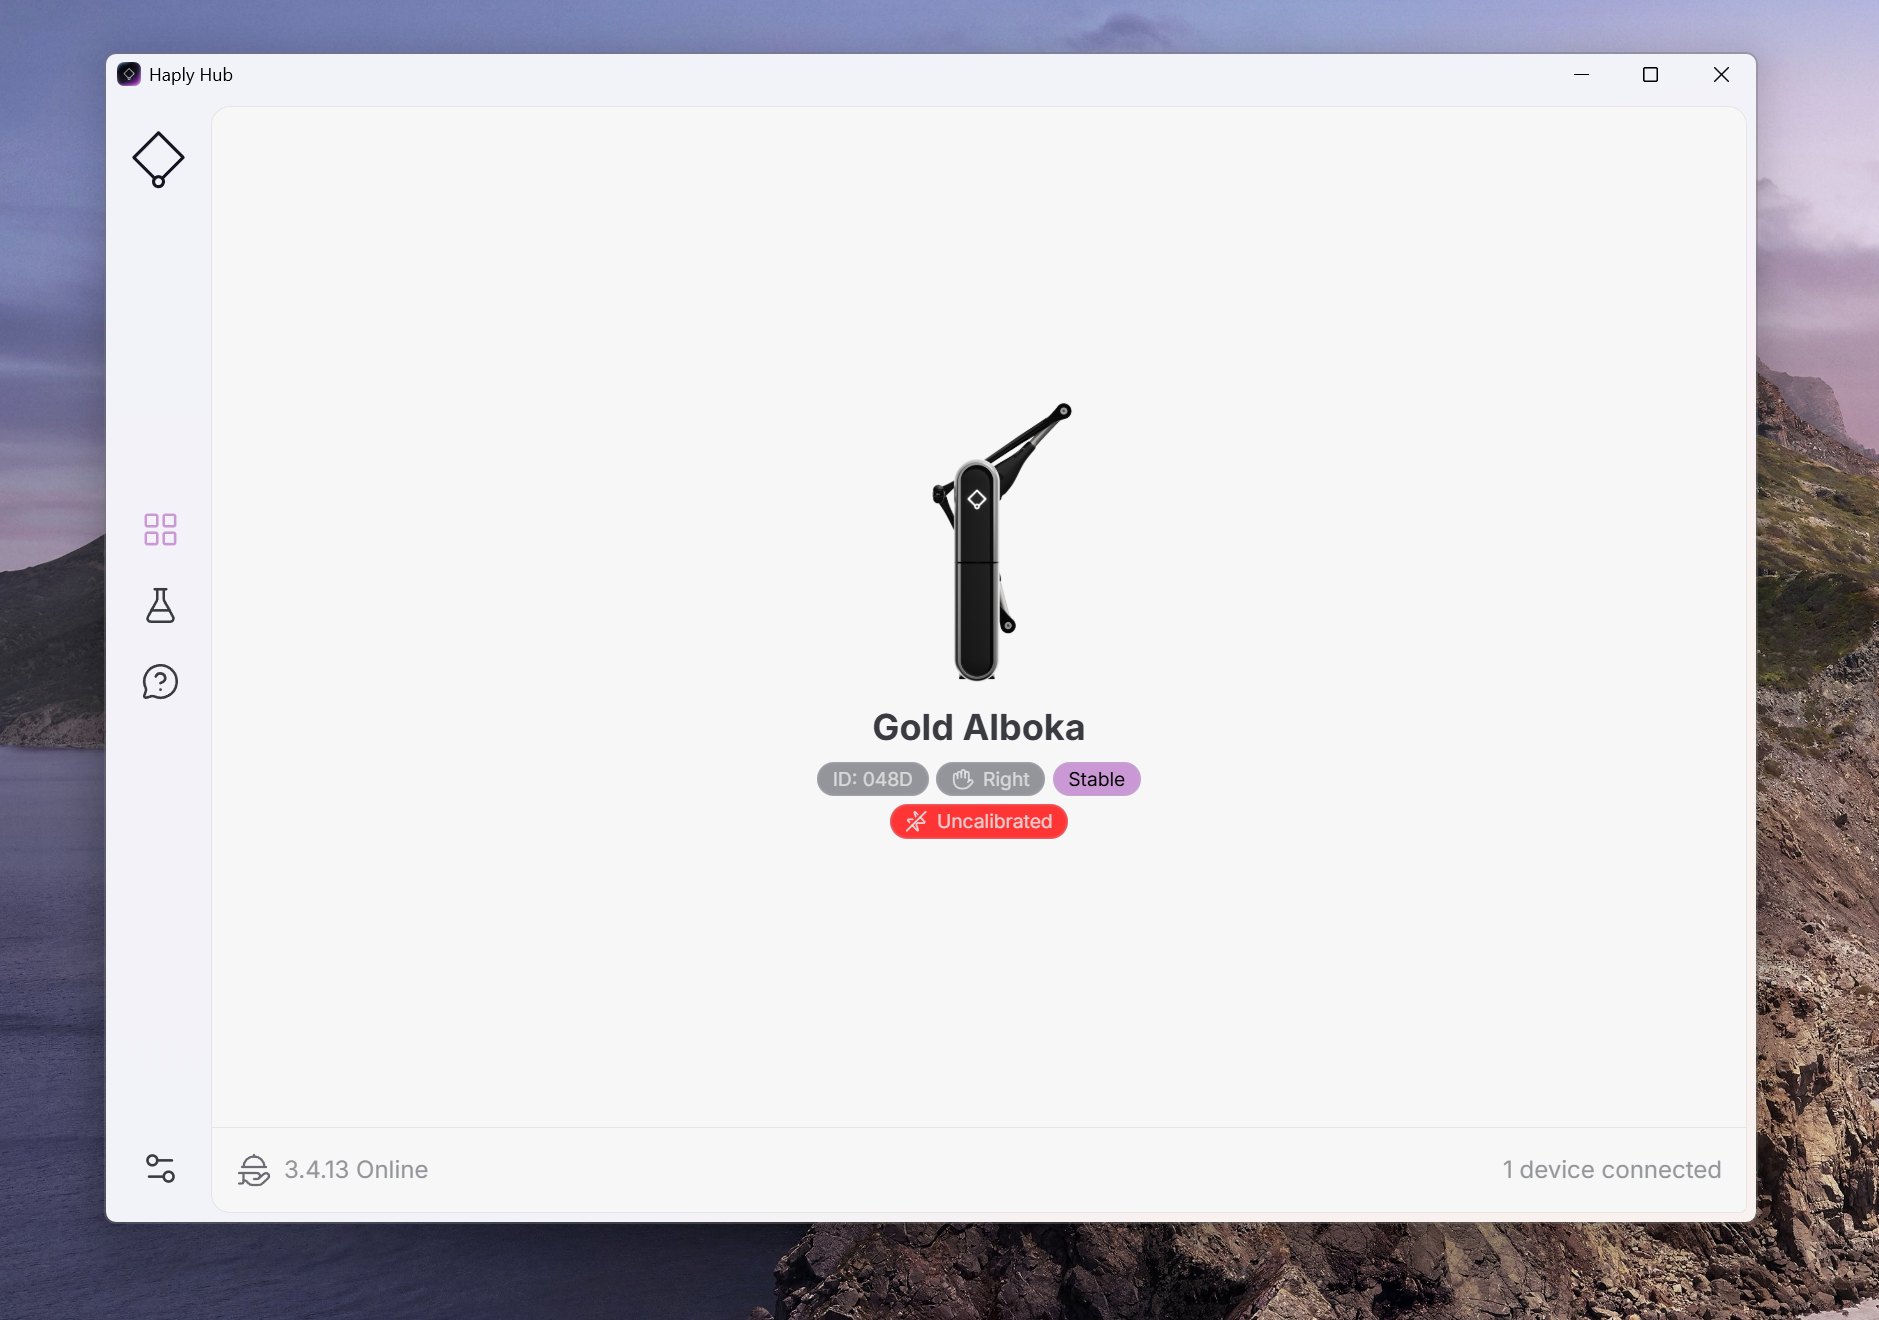
While the Haply Hub is running, you should be able to see your devices pop up as you begin to connect them to your computer.
Connect the Inverse3 to the computer using the USB cable and wait until the Haply logo lights up red then turns immediately purple. If the status light remains red, ensure the USB cable is secure or try a new USB cable.
Note: For a comprehensive explanation of the status lights, refer to our Colour Codes table under Developing with Inverse3.

Plug the power supply into an outlet nearby and insert the barrel jack from the power supply into the 24V power socket on the device.
We strongly recommend connecting the Inverse3 directly to your computer using the provided USB cable.
Avoid using a dongle or intermediary connection, as this can slow down communication. Faster communication ensures smoother haptics. If you experience any issues, please check the USB connection. Using other USB cables may result in dubious quality and performance.
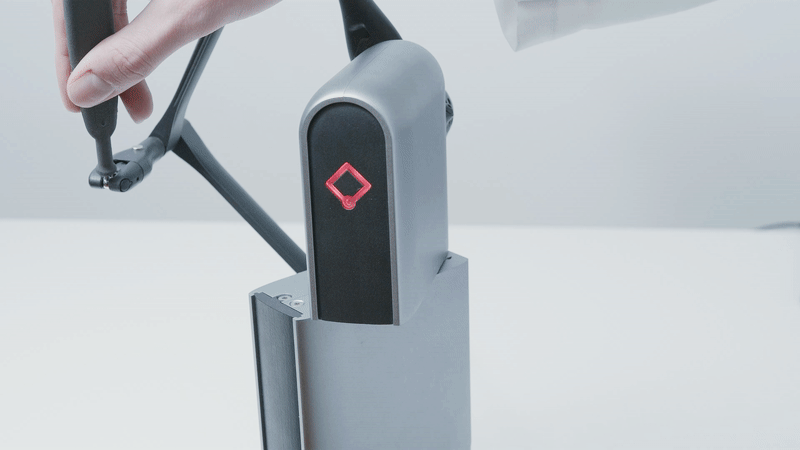
Calibration
Inverse3 requires calibration before usage which ensures accuracy of position and force. To calibrate, simply touch the protruding magnet on the gimbal to the calibration point. When complete the status white will turn white, indicating that you can now start a simulation.
Setting Up Two Inverse3 devices in Bi-Manual Configuration
The Inverse3 devices may be used at any angle, including upside down. The VerseGrip clamp gives you the flexibility to try different angles to find what best suits your specific needs.
For a straightforward bimanual set up, Haply recommends that you face the icons of the device towards you, to get the most angular freedom from the stylus without your hand or fingers colliding with the arms or gimbal
Connecting a Wireless VerseGrip or accessory
The Inverse3 uses a quick connect mechanism for connecting VerseGrips. To make the connection, hold the device's arms and tool firmly in separate hands, and push the spherical tip of the tool into the clasp at the end of the arms until the mechanism clicks shut.
To disconnect the tool, tilt the tool towards the device's arms until the clasp pops open, releasing the tool.

Haptic Demos
Now, download the demo package and unzip the files. The unzipped folder contains a set of demos built using Chai3D which will allow you to sense the Inverse3 force-feedback and performance. The first demo simulates a gel membrane which can be touched, bounded and punctured as shown below. Try out other demos in the folder to discover the Inverse3’s capabilities.
The demos are compatible with Service version 3.1.0 and later. If the service is not running, the demos will automatically connect to the service using HardwareAPI.
The demos will not function if a service version lower than 3.1.0 is detected. Please ensure the service is updated to avoid compatibility issues.
