Getting started with the VerseGrip Quill
VerseGrips add orientation tracking abilities to the Inverse3. This article outlines the VerseGrip Quill setup procedure and its features. This product is being phased out in favour of the VerseGrip Stylus.
VerseGrip Quill Anatomy
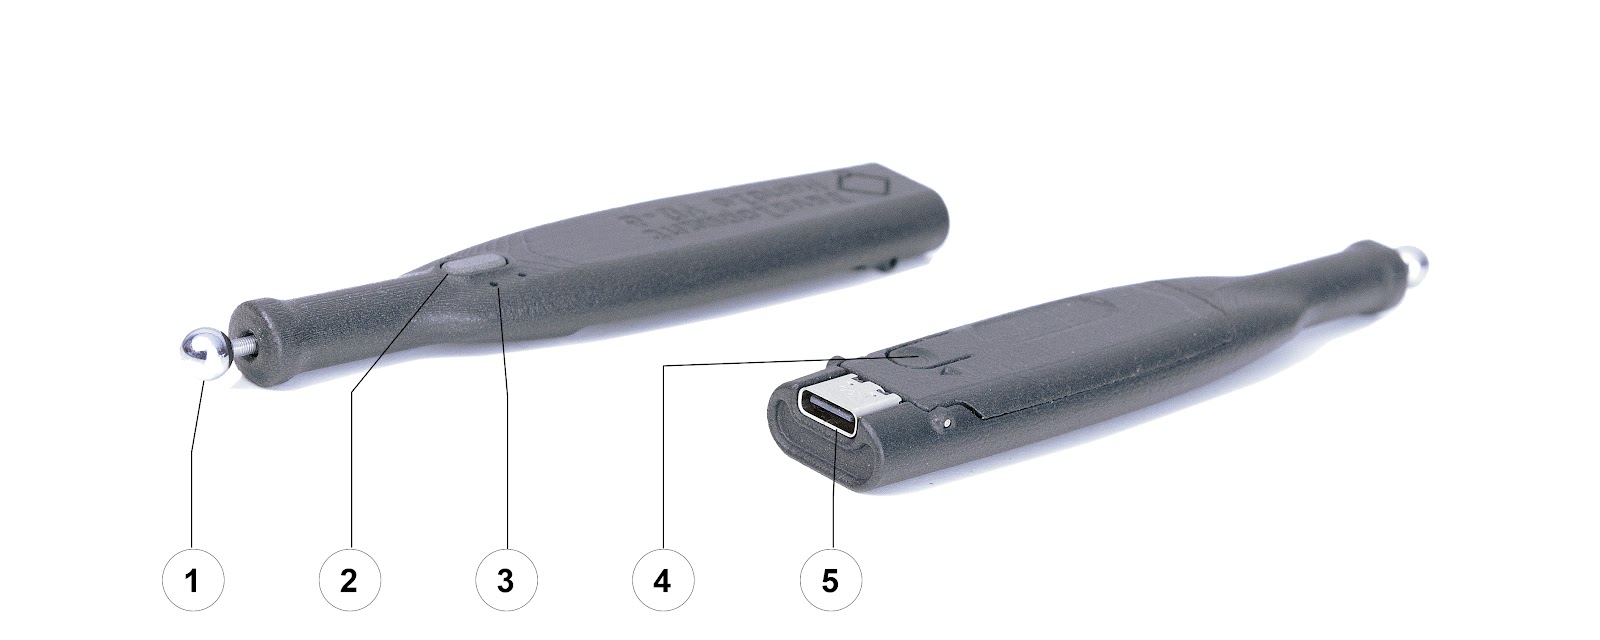
The VerseGrip Quill has three main features on the outside: (1) The ball connector which fits into the Inverse3 gimbal, (2) Input button, (3) Status LEDs, (4) Calibration button, and (5) USB-C port.
On the inside, the tracked VerseGrip Quill contains a 3-axis orientation sensor as well as a tool attachment sensor which detects when the VerseGrip Quill connects to an Inverse3 device.
VerseGrip Quill Setup and Calibration
Start by downloading and installing the VerseGrip Quill drivers onto your computer. Next, connect the VerseGrip Quill using the USB-C cable to the computer.
Before use, the VerseGrip Quill requires calibration and it may require recalibration after extended use. To calibrate:
- Hold the powered VerseGrip Quill perpendicular to the monitor
- Press the calibration button located on the bottom of the VerseGrip Quill for 3 seconds
- Continue to point the VerseGrip Quill towards your monitor for 2 seconds
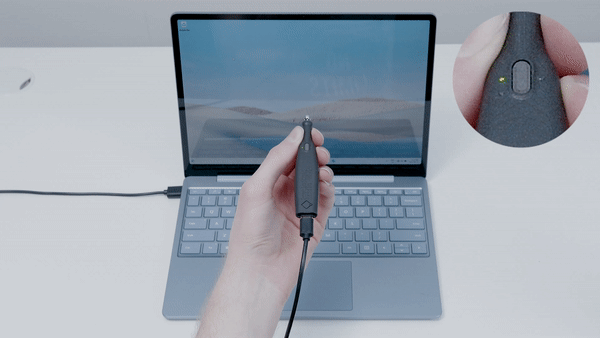
While calibrating the yellow LED will stay on. When the yellow calibration light blinks twice, calibration is complete.
LED Status
The VerseGrip Quill has two LEDs that indicate its power state and calibration status.
| LED | State | Status |
|---|---|---|
| Green | on | Power on |
| Green | off | Power off |
| Yellow | on | Calibrating |
| Yellow | 2 flashes | Calibration complete |
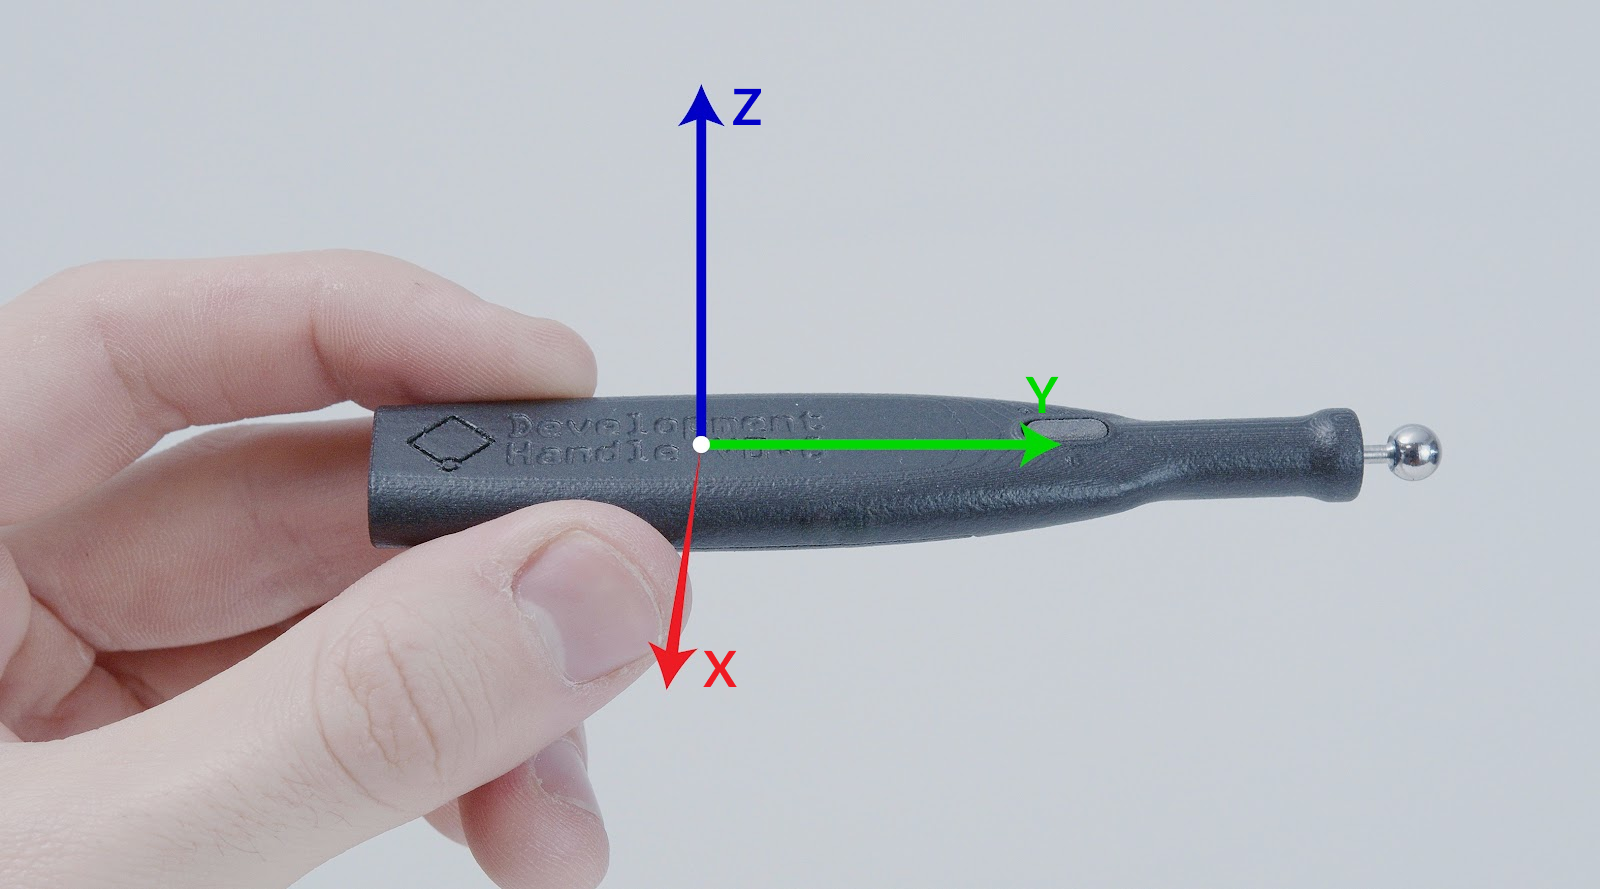
Reference frames
The VerseGrip Quill uses a right-handed coordinate system, like the Inverse3, and its axes are shown below.