Appendix E - SICK Safety Controller
FlexiSoft Safety Controller
Overview
Safety controllers are often used in industrial automation to improve safety between equipment and people. SICK is a leading brand in industrial safety worldwide. In this document, we cover the integration of both the FlexiSoft controller in HARP. Using this controller alongside HARP allows the safety controller to take real-time action and perform safety functionality to keep the workers safe, while it also communicates with HARP. This connection allows HARP to understand the true state of whether the system is safe to operate or not.
Terminology
PLC - Programmable Logic Controller
IP Address - (connect_addr)
The address you give your controller. You need a static IP address. DO NOT select DHCP or your connection will break every time you power cycle your system.
Default Gateway - (gateway)
The base IP address of your network. Often 192.168.0.1 or 10.0.0.1
STOP Byte - (estop_byte)
Consider this a full stop or e-stop trigger
PAUSE Byte - (pause_byte)
Consider this a normal process interruption. The system will treat this similar to releasing the clutch on the stylus.
Download - Safety Designer
SICK provides a software for programming their controllers called Safety Designer. It provides the User Interface for routing logic, Signing verifications of safety programs, debugging and communication. SICK has resources on their website on how to use Safety Designer.
Example Hardware
The hardware required for this example setup:
- FlexiSoft CPU - FX3-CPU000000
- FLexiSoft System Plug - FX3-MPL000001
- FlexiSoft Programming Cable - DSL-8U04G02M025KM1
- FlexiSoft Ethernet/IP module - FX0-GENT00000
- FlexiSoft XTIO - FX3-XTIO84002
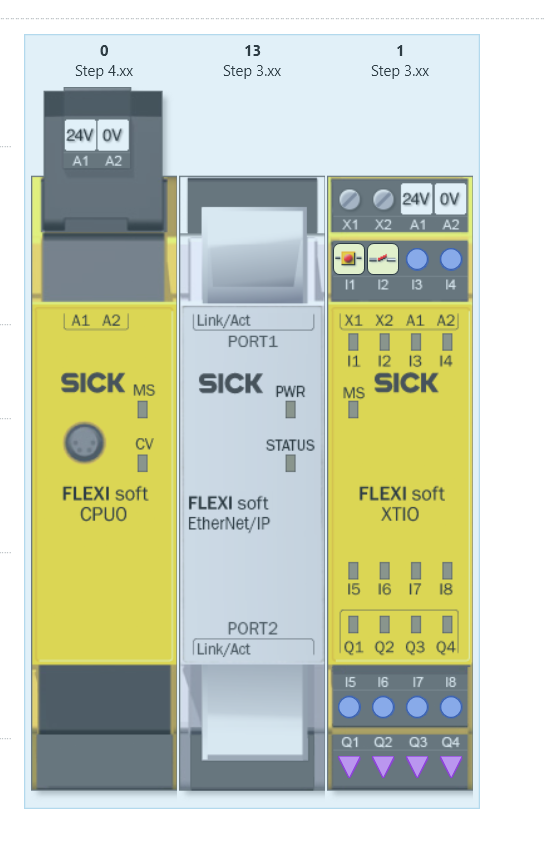
Setup your Safety PLC
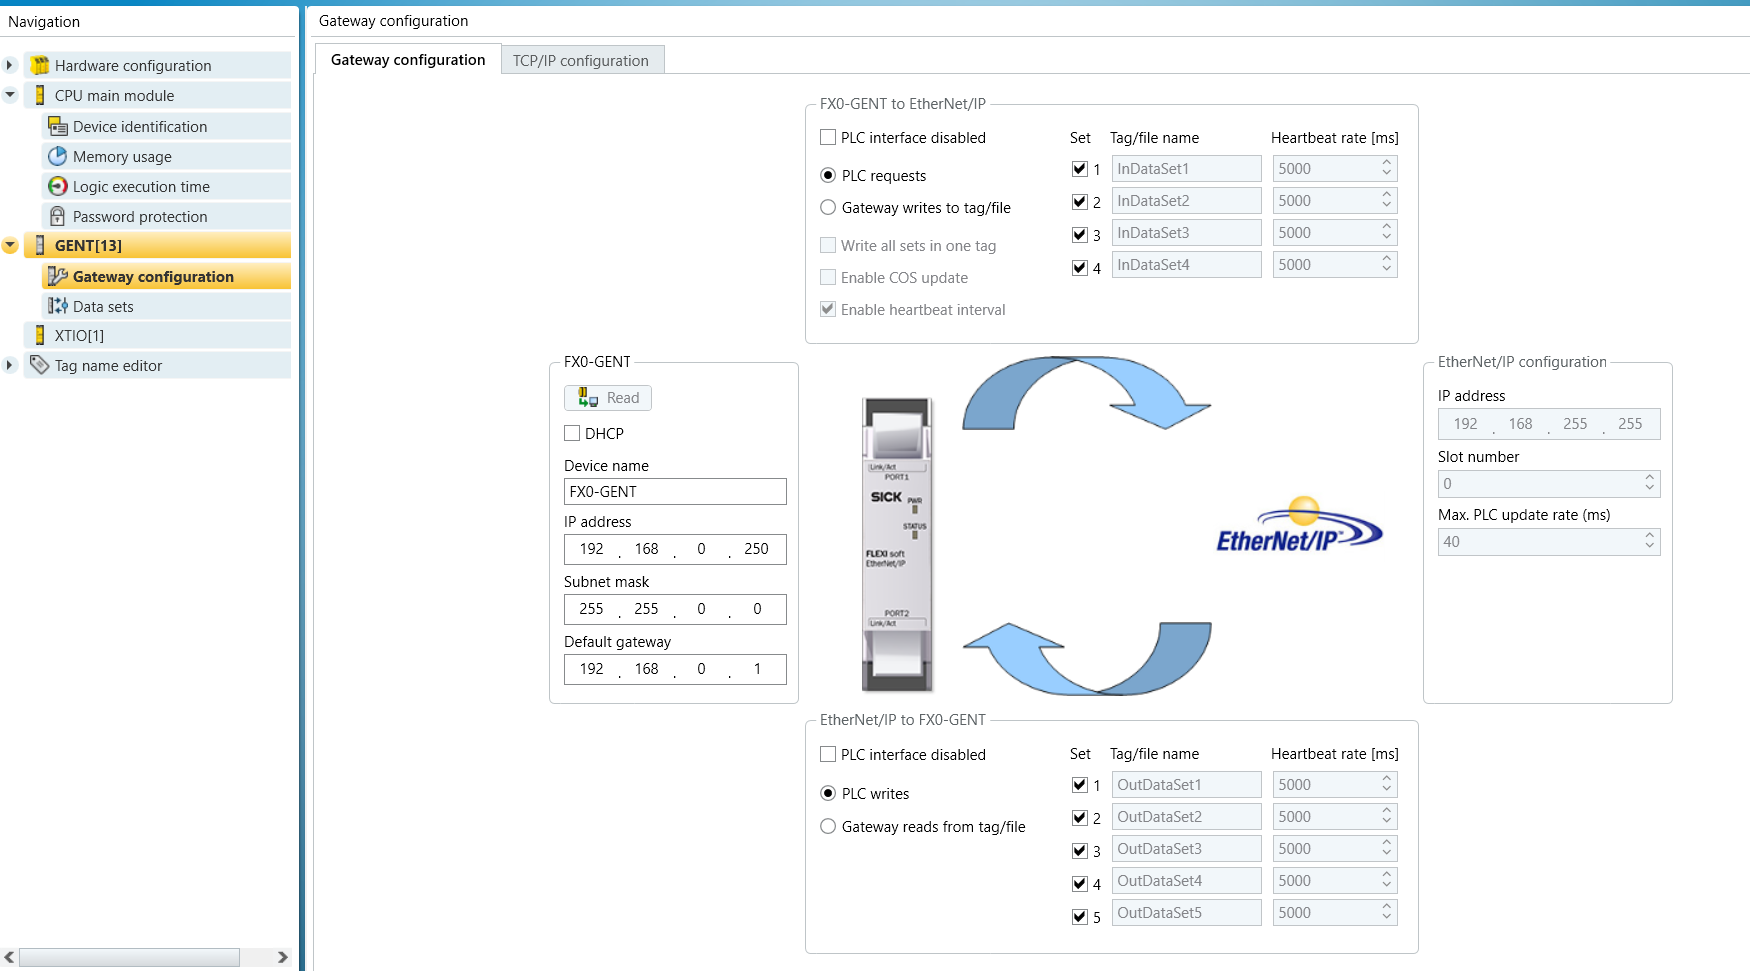
Network Setup:
In the GENT gateway configuration tab setup your Ip address and Default gateway
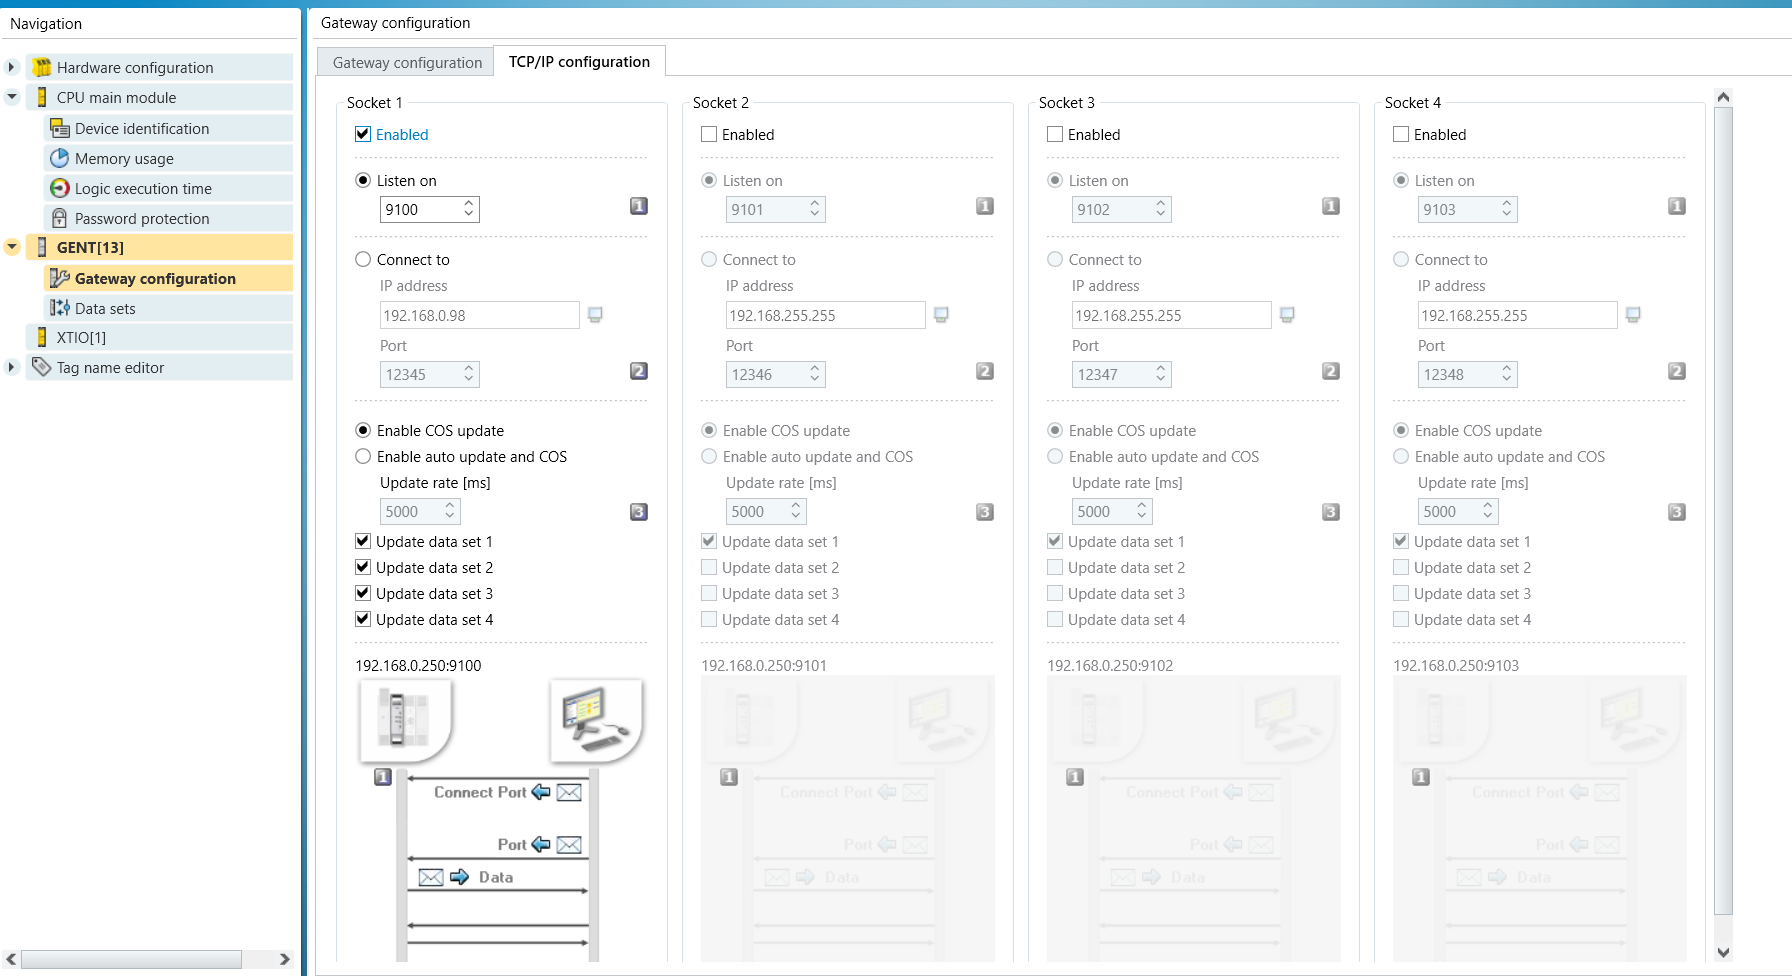
Go to the TCP/IP Configuration tab and enable Listen On and set your preferred port number. The default, 9100 is fine in most cases.
Go to Data sets and decide which output bytes you want to use for triggering STOP and PAUSE
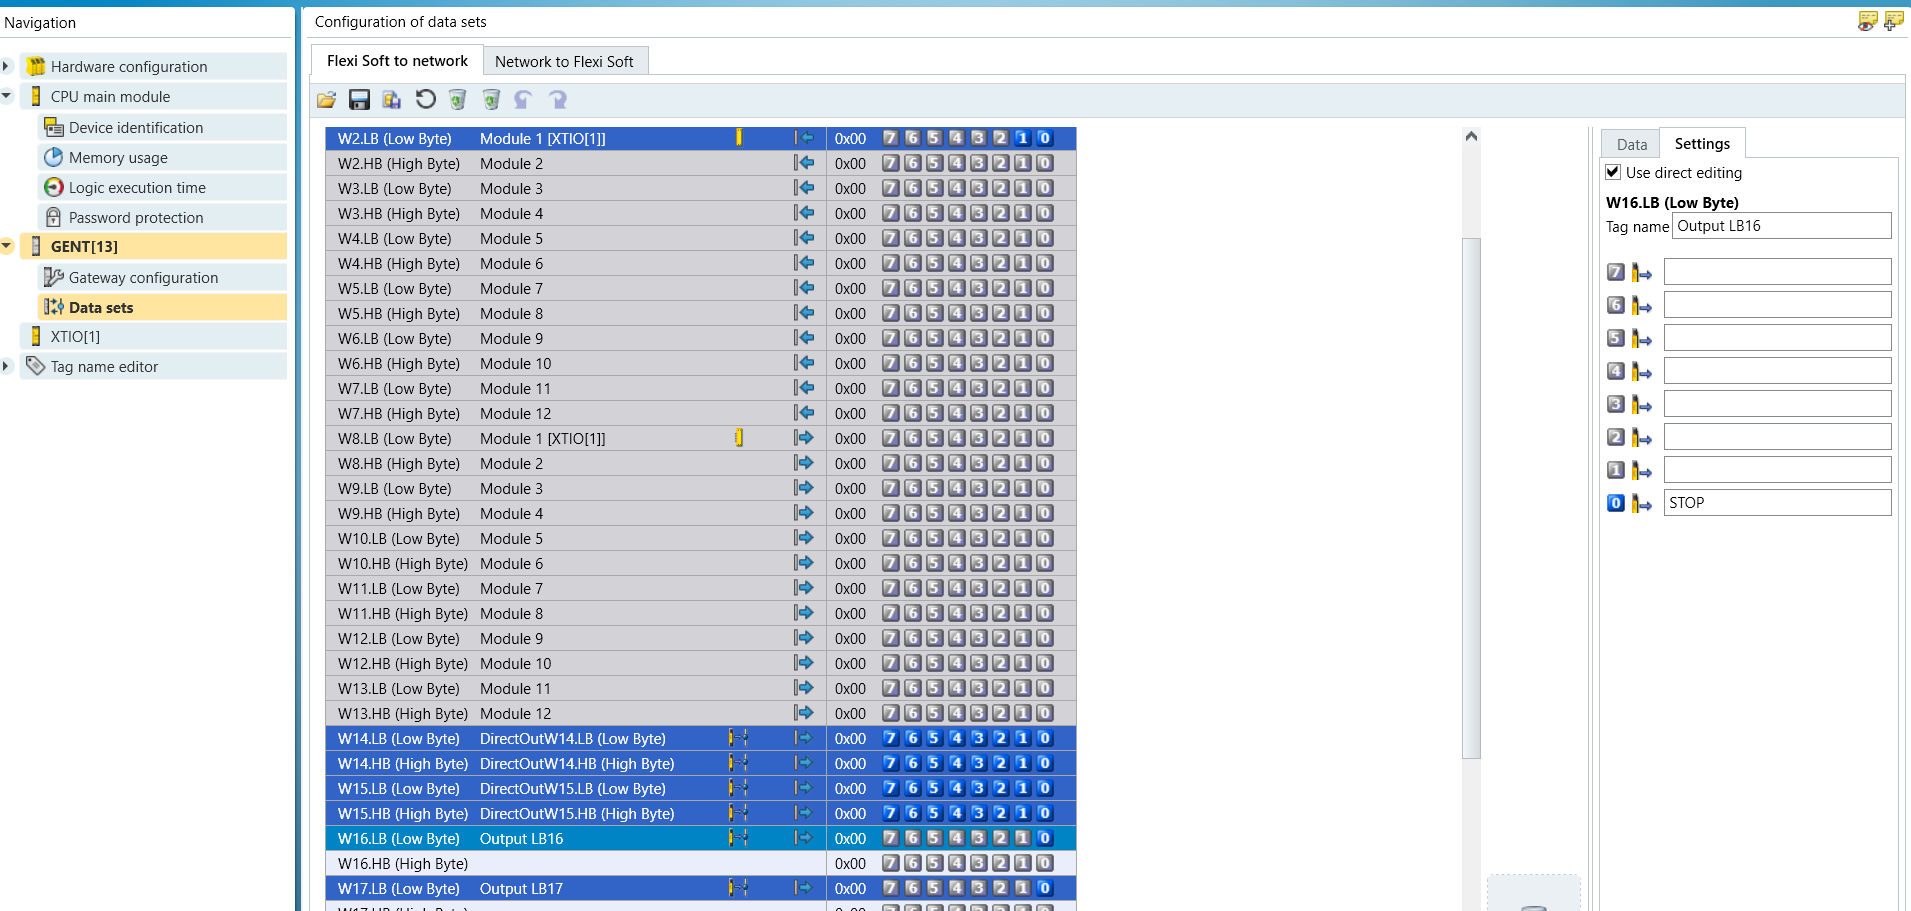
Harp monitors Bit 0 of whichever byte you choose. It treats the Byte like a Boolean. Do not pick other bits, they will not work.
Here we use:
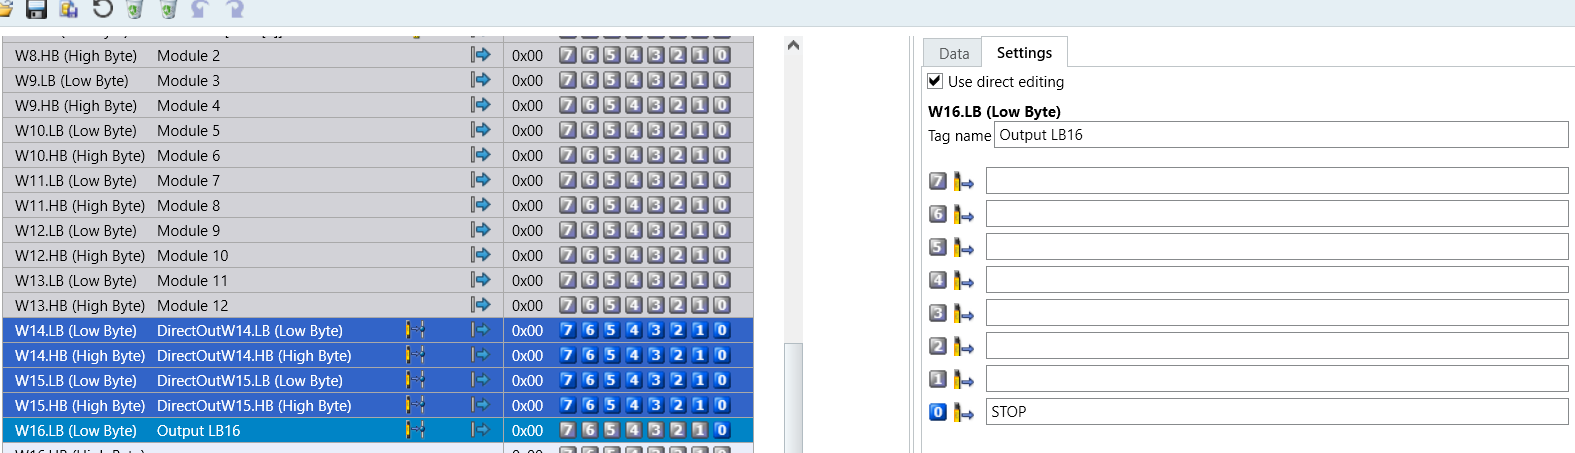
Byte 16 (Low Byte) for STOP
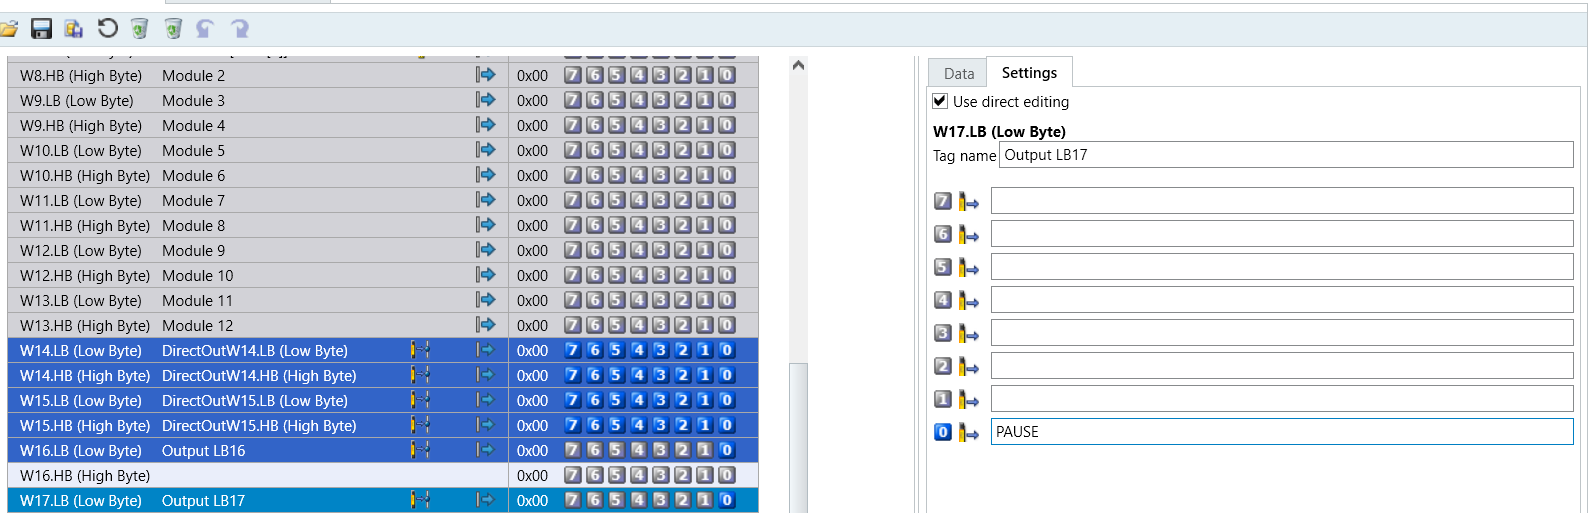
Byte 17 (Low Byte) for PAUSE
Select Line W16.LB (low byte) and notice on the right side at bit 0, you can name it STOP
This tagging is to help identify the items in your program later.
Select line W17.LB (low byte) and notice on the right side at bit 0, you can name it PAUSE
Programming
HARP expects the Bytes you select to be HIGH when the system is in the ready / safe state. This monitoring control type allows the tags to declare that the controller turned on and safety is present before operation. If the controller is not connected, it considers the tags to be triggered and will prevent operation until the Bytes are set HIGH. Here is a program that has a N.O. push button that represents a door switch or light curtain connected to the pause tag(17.LB). The E-stop is a N.C. contact that is routed directly to the STOP tag (16.LB).
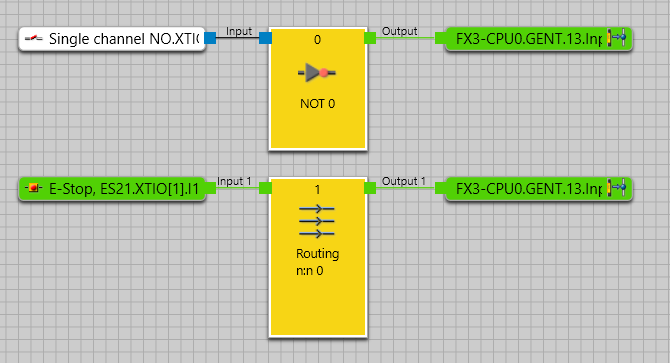
If the N.O. button is pressed, HARP will pause all teleoperation until the button is released and 16.LB goes HIGH again.
If the E-Stop is pressed, HARP will completely stop the session and prevent it from continuing until the E-Stop is cleared and then a reset can be performed.
Modify your PLC program to match your system needs. You can have many switches connected to a single Tag. You should have logic that connects to your robots built in safety logic.
Push your program to the PLC with the “Transfer to device” button and move to the next step.
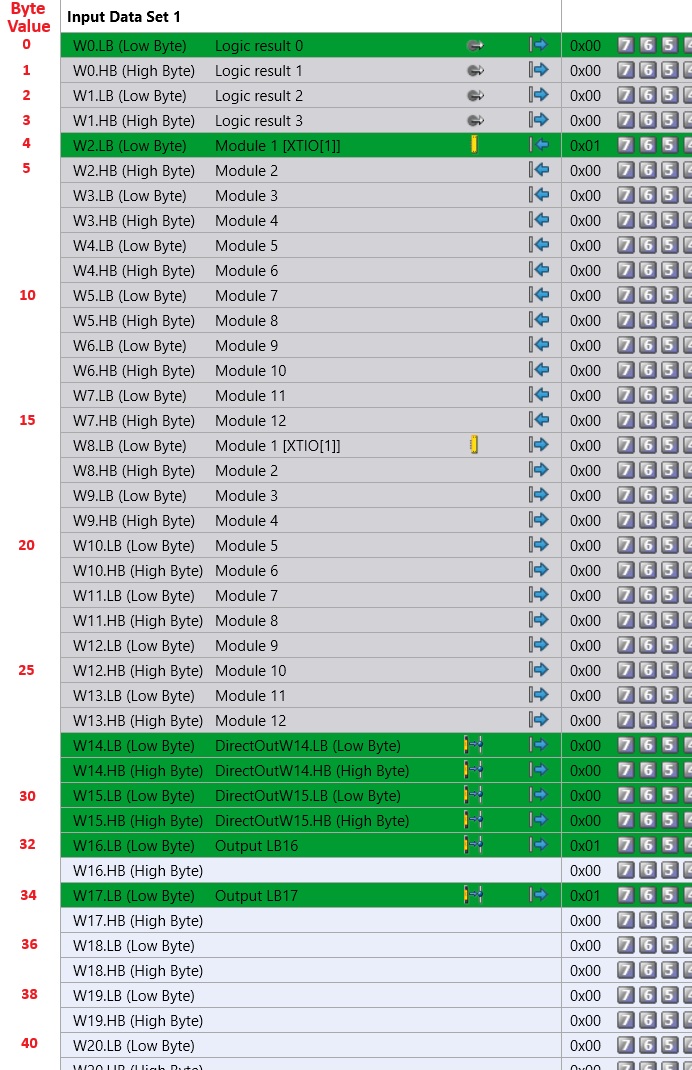
Map the bytes you chose and the Byte Value it corresponds to in this chart below.
HARP Project Setup
- In an existing HARP project, open the “Project.json” in a text editor

-
At the bottom of your Project.json you will find a variable called “safety_controller”
Remove the “null” tag and add the fields shown here.connect_addr is the IP address of your Safety controller
pause_byte and stop_byte should be equal to the corresponding byte value in the chart shown in controller setup.
gateway for FlexiSoft should be “flexi_soft_gateway”
gateway for Flexi Compact should be “gpnt1” -
Save and close this file
-
Launch HARP again and connect your devices.
-
Enter the Command Screen for teleoperation
-
You should now have control to PAUSE and resume or E-STOP and break the session in HARP for a safe robot control experience.
Troubleshooting: If you open your project and it fails to load or you can’t teleoperate at the control screen. This is an indication that the setup is not correct.
Remember that the Byte’s in your program always need to be HIGH for the system to run. Otherwise it acts as if it is triggered.
- Check the Ip address and port in your Safety Designer project.
- Use the chart above, check if you correctly mapped your chosen Bytes with the value required in the project file.
- Ensure you set the gateway name correctly