Command Center
The Command screen is the primary workspace in HARP during teleoperation. It includes multiple panels for real-time leader and follower data, system logs, monitoring, motion control, and recording/playback functions.
The main HARP interface uses a dockable panel layout. Panels can be rearranged using drag-and-drop to create a workspace that matches your preferred workflow.
When you save a project, the current panel layout is saved with it. You can also create and save custom panel profiles to maintain different interface layouts for different tasks or operating modes.
The image below shows the main areas of the full Command screen. Each section is described in more detail in the following subsections.
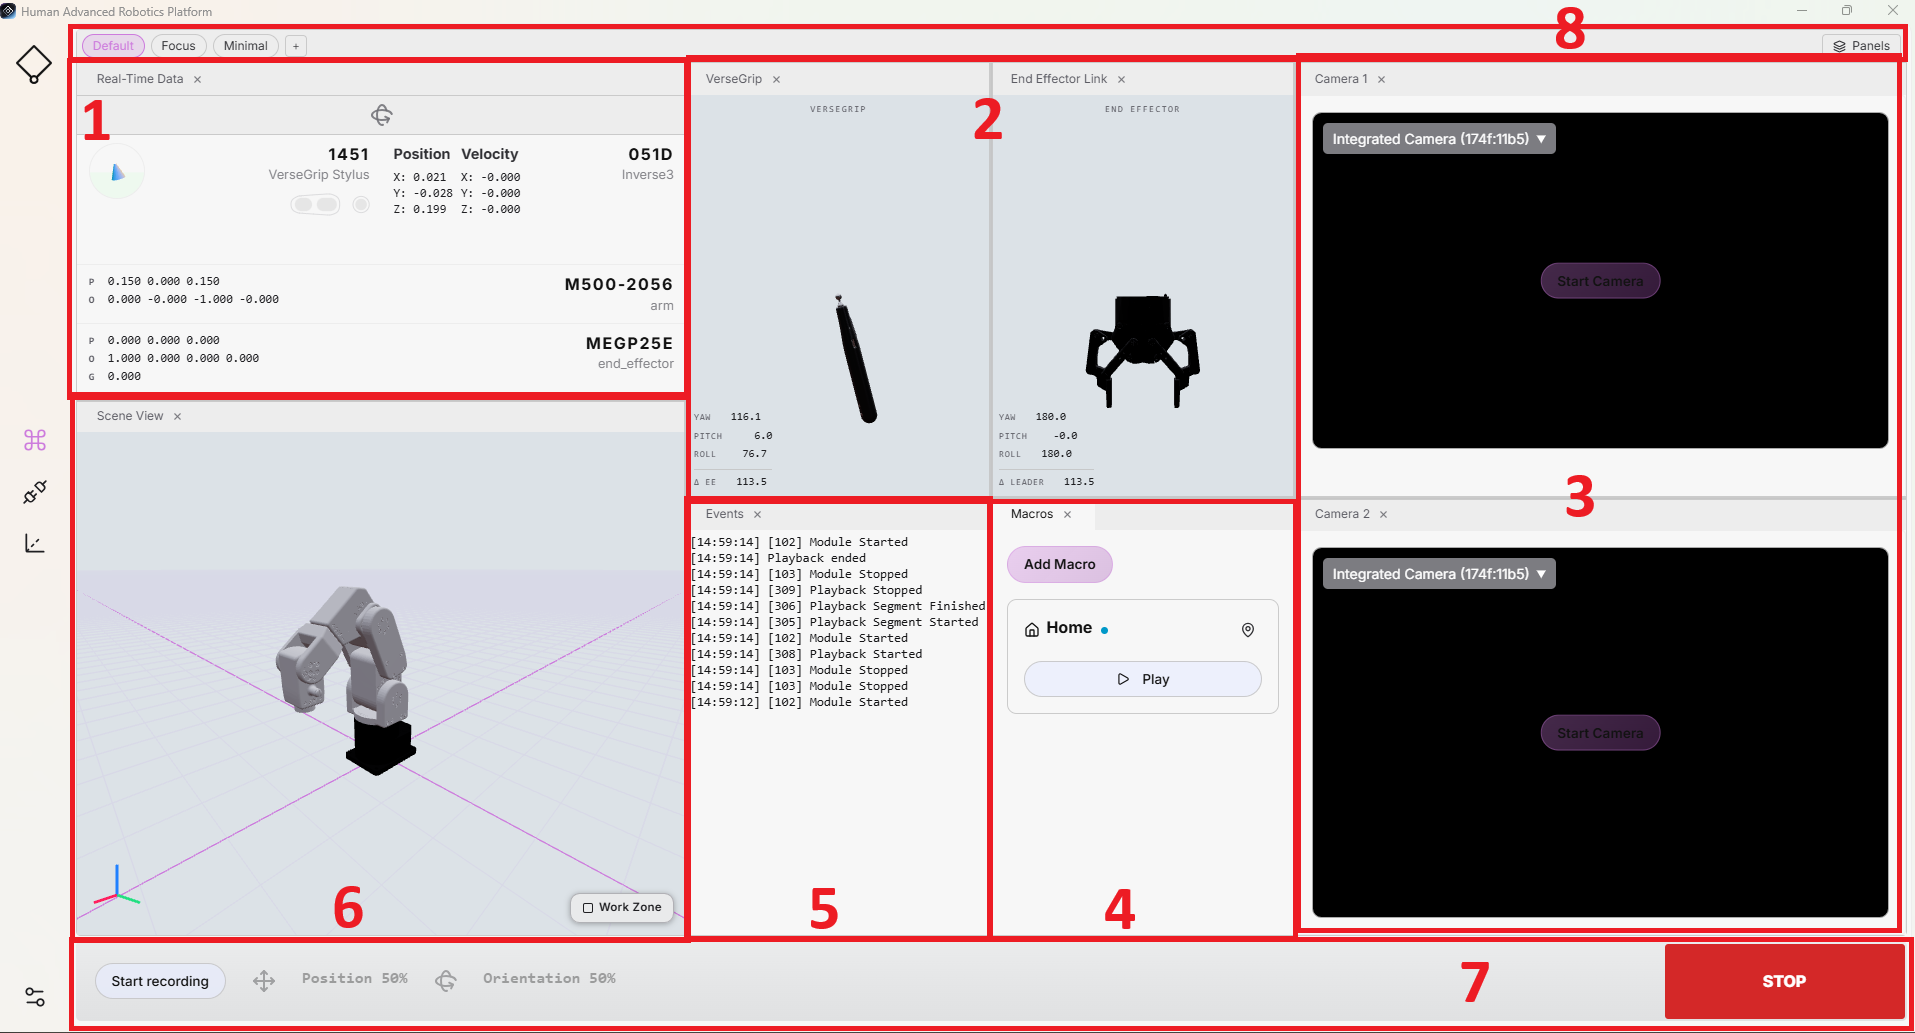
1. Real-Time Data
This panel displays real-time data from both the leader and follower devices, including the VerseGrip or Ruko pose and battery status, the robotic arm's TCP pose, and the connected gripper.
It provides continuous access to key teleoperation data and status information from the leader and follower devices. The panel also indicates whether orientation control is enabled and whether the clutch is currently engaged.
2. VerseGrip/Ruko and End-Effector Link
These two panels provide a 3D visualization of the VerseGrip or Ruko position, along with the orientation-control state of the follower end effector.
To provide a consistent visualization across different follower devices, orientation control is represented using a generic gripper model. When orientation control is activated, the visualization changes color to clearly indicate its current state.
The leader visualization can also help verify device calibration by allowing the user to compare the displayed leader motion with the corresponding robot motion.
3. Cameras
The user can enable up to two camera streams for monitoring purposes.
This panel supports external USB cameras as well as RTSP camera streams. Each camera can be enabled or disabled at any time during operation.
The camera view can be adjusted by flipping or rotating the video stream as needed. The stream can also be popped out into a separate window, allowing it to be maximized or displayed on another monitor.
4. Macros
This panel displays all available macros. Each macro can contain either a single recording or a sequence of recordings that can be played back directly from the Command screen.
You can add an unlimited number of macros to a project. The recording process is described in the 7. Command Bar. To execute a recorded motion, click the macro's Play button.
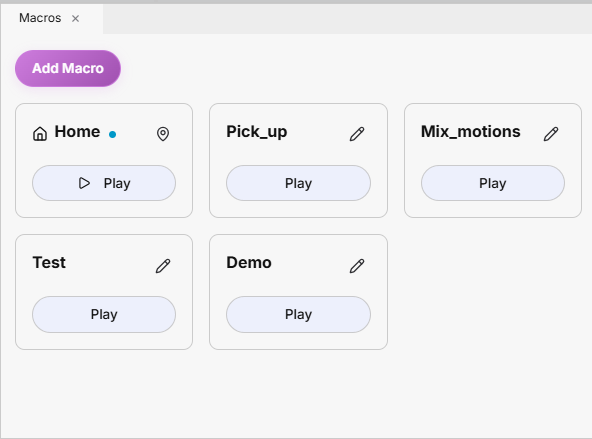
Available macro actions include:
- Click a macro to edit or delete it. Editing allows you to update its name or replace its associated recording.
- Click Add Macro to create a new macro button. The macro is saved with the project and will be available the next time the project is opened.
- Clicking a macro's Play button opens a confirmation prompt before execution, helping prevent accidental robot motion.
The recording and playback workflows are explained in detail in Recording and Playback.
Configurable Home Pose
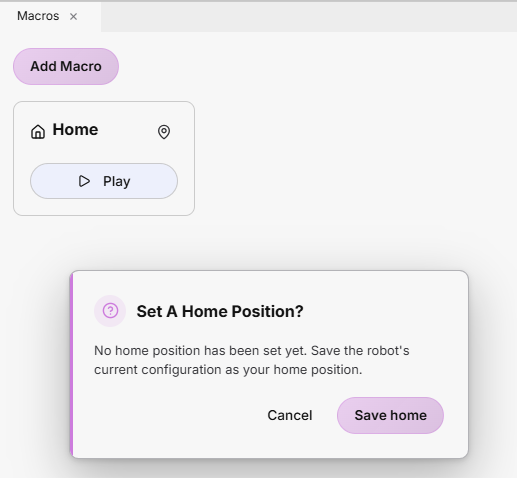
By default, a macro named Home is available in the Macros panel. This macro is initially empty and ready to be configured.
To define a Home pose, move the robot to the desired position using teleoperation, or move it to the default Home pose described in Robot Parameters. Choose a position that is appropriate and safe for your application and workspace.
The first time you click Play on the Home macro, a dialog will prompt you to configure a Home position. Click Save Home to store the robot's current pose as the Home pose for future use.
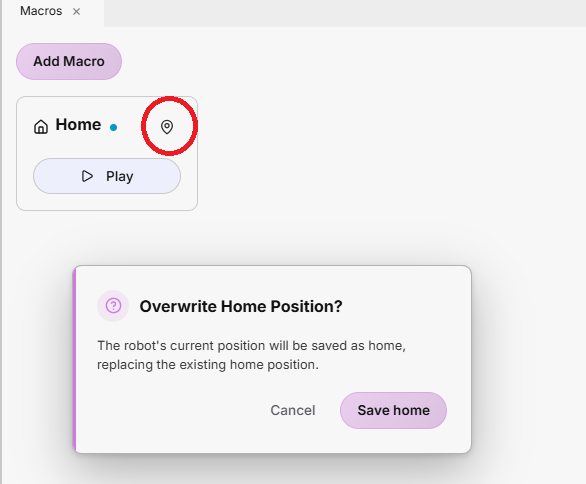
To change the Home pose later, click the icon in the top-right corner of the macro and overwrite the existing configuration with a new robot pose.
Collision Avoidance
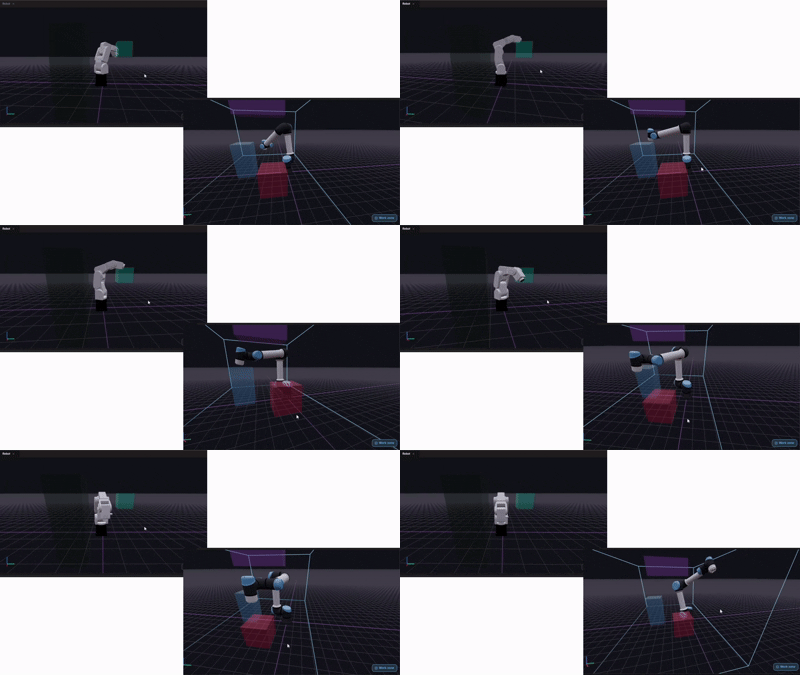
To support safer motion when moving to the configured Home Pose, HARP includes an automatic collision-avoidance path planner that considers the exclusion zones defined in the workspace.
When the user activates the Home macro, HARP calculates a path from the robot's current pose to the configured Home Pose while avoiding the defined exclusion zones. The resulting motion path is then sent to the robot for execution.
The path is recalculated each time the Home macro is activated. This allows HARP to account for changes in the workspace configuration and generate a new collision-avoiding path based on the robot's current pose and the latest scene definition.
5. Events
This panel provides a running summary of session activity, system events, and warnings. Events are designed to be concise and informative, giving the user quick visibility into important changes during operation.
Events are separate from the detailed runtime logs. For troubleshooting or more detailed diagnostic information, the HARP runtime logs can be found at: C:\Users\<username>\AppData\Local\HARP\logs
6. Scene View
This panel provides a 3D visualization of the workspace, including the robot, workspace limits, and configured collision or exclusion zones.
When a workspace scene is created as described in Workspace, the configured objects and boundaries are also displayed in this panel. The visualization is directly linked to the current workspace configuration.
By default, the robot and configured collision objects are displayed. The Work Zone visualization can be shown or hidden using the button in the bottom-right corner of the panel.
A reference coordinate frame is displayed in the bottom-left corner of the panel:
- Red: X-axis
- Green: Y-axis
- Blue: Z-axis
7. Command Bar
The Command Bar provides quick access to key teleoperation controls, including motion scaling, axis locking, motion recording, and session stop/reset functions.
- Stop: The large red button on the right side of the Command Bar immediately stops active teleoperation and motion-related interactions.
Pressing the Esc key on your keyboard also activates Stop.
-
Scaling: Defines how far the follower moves relative to the leader. The scaling value can be adjusted using the slider.
- 100%: Leader moves 5 cm → Follower moves 5 cm
- 50%: Leader moves 5 cm → Follower moves 2.5 cm
Translation and orientation scaling can be adjusted independently.

When operating a new robot or tool for the first time, begin with a lower motion scale and increase it gradually as you become familiar with the system.
-
Axis Lock: Allows individual translational or rotational axes of the robot to be locked during teleoperation.
- Press X, Y, or Z to lock or unlock the corresponding translational axis.
- Press Shift + X, Shift + Y, or Shift + Z to lock or unlock the corresponding rotational axis.

- Start Recording: Begins capturing follower motion data at a rate of 100 Hz. When recording is complete, click End Recording to stop the process and save the recorded motion to the project's
raw/folder. Recorded motions are stored in the.hrprfile format.

- Lock All Axes on Focus Loss: For safety, HARP can automatically lock all robot axes when the HARP window loses operating-system focus. If focus is lost during active teleoperation, motion control is stopped and teleoperation remains disabled until the required conditions are restored.

8. Panel Profile
The main Command screen uses the Default layout, which displays the full set of configured panels.
HARP also includes additional predefined layouts:
- Focus: Displays only the robot workspace visualization.
- Minimal: Displays the robot workspace visualization together with the Events panel.
You can also create a custom layout by clicking the + button and entering a name for the new layout.