Create a New Project
When HARP launches, it automatically opens the Connections tab. From this tab, you can create a new project or open an existing one.
Supported Haply devices, such as the Inverse3, VerseGrip, or Ruko, are automatically detected by HARP. As shown in the image below, each connected device appears in the Connections tab together with its device ID.
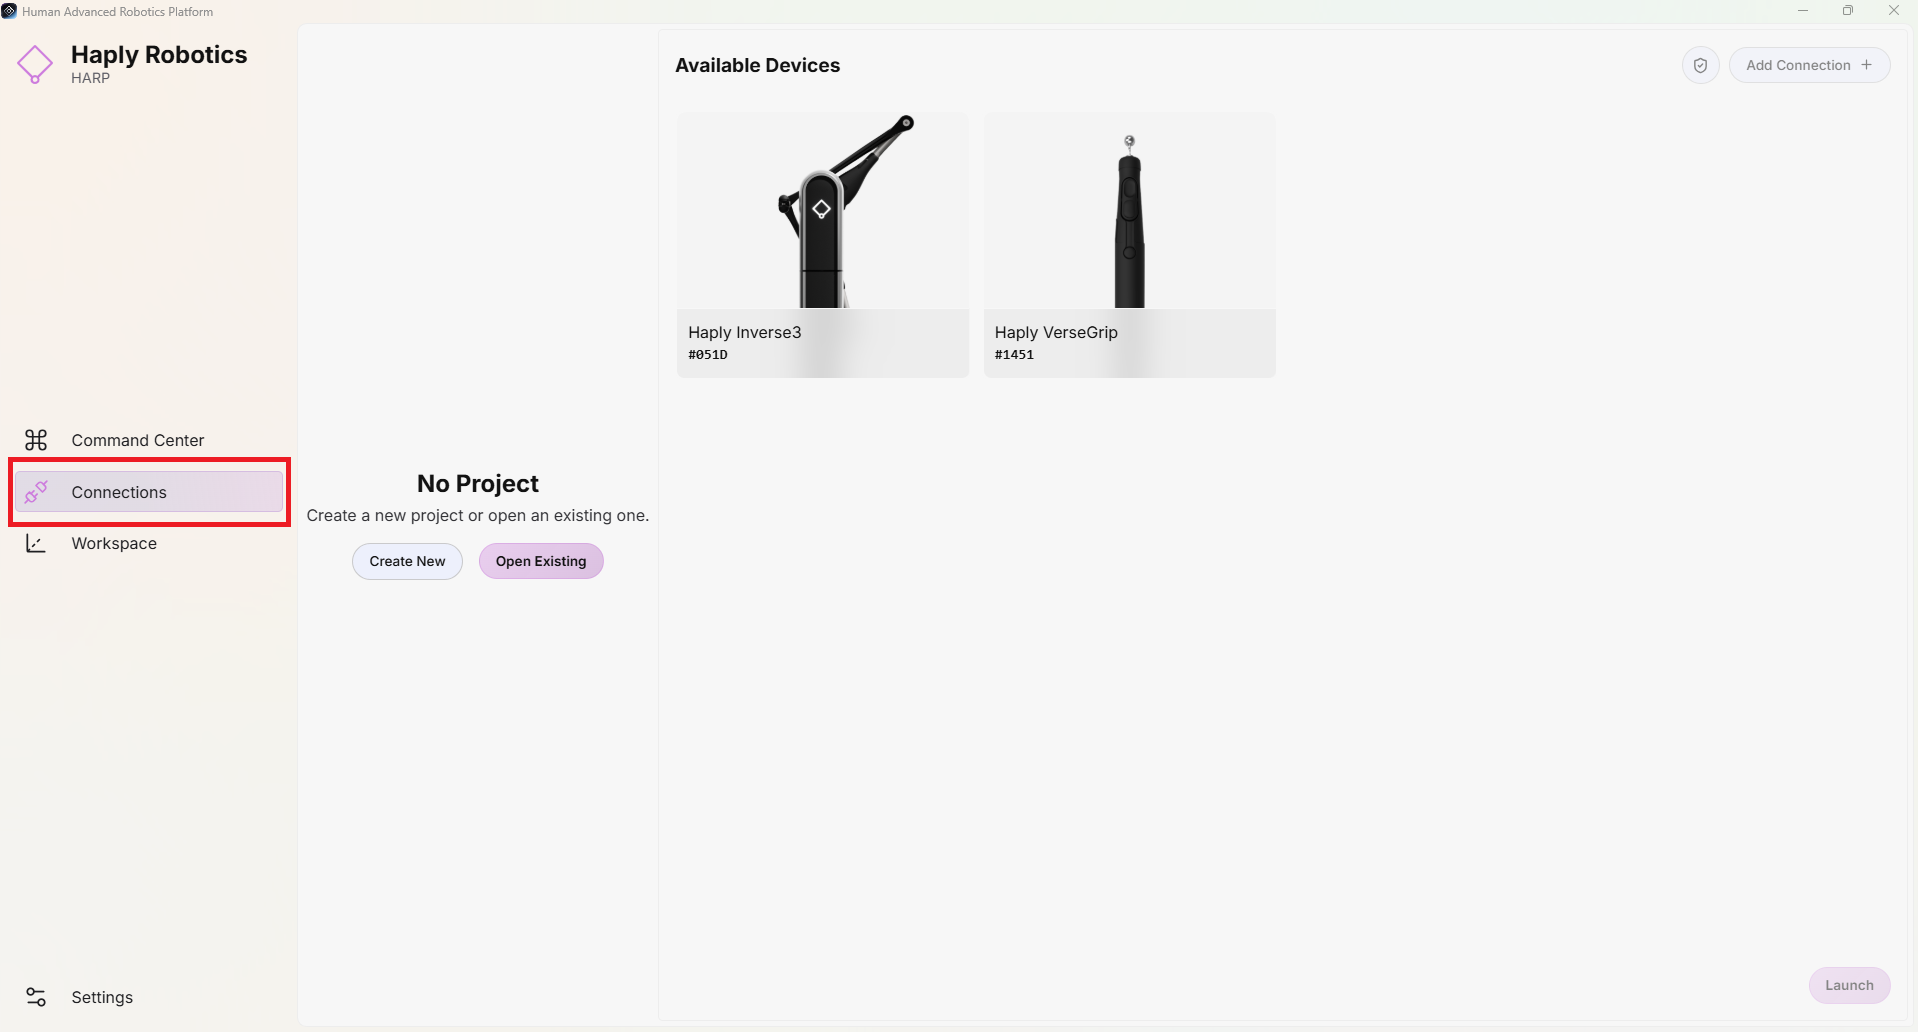
Click the Create New button and enter the desired project name. Then, click Create New again and select the directory where the new project folder will be created.
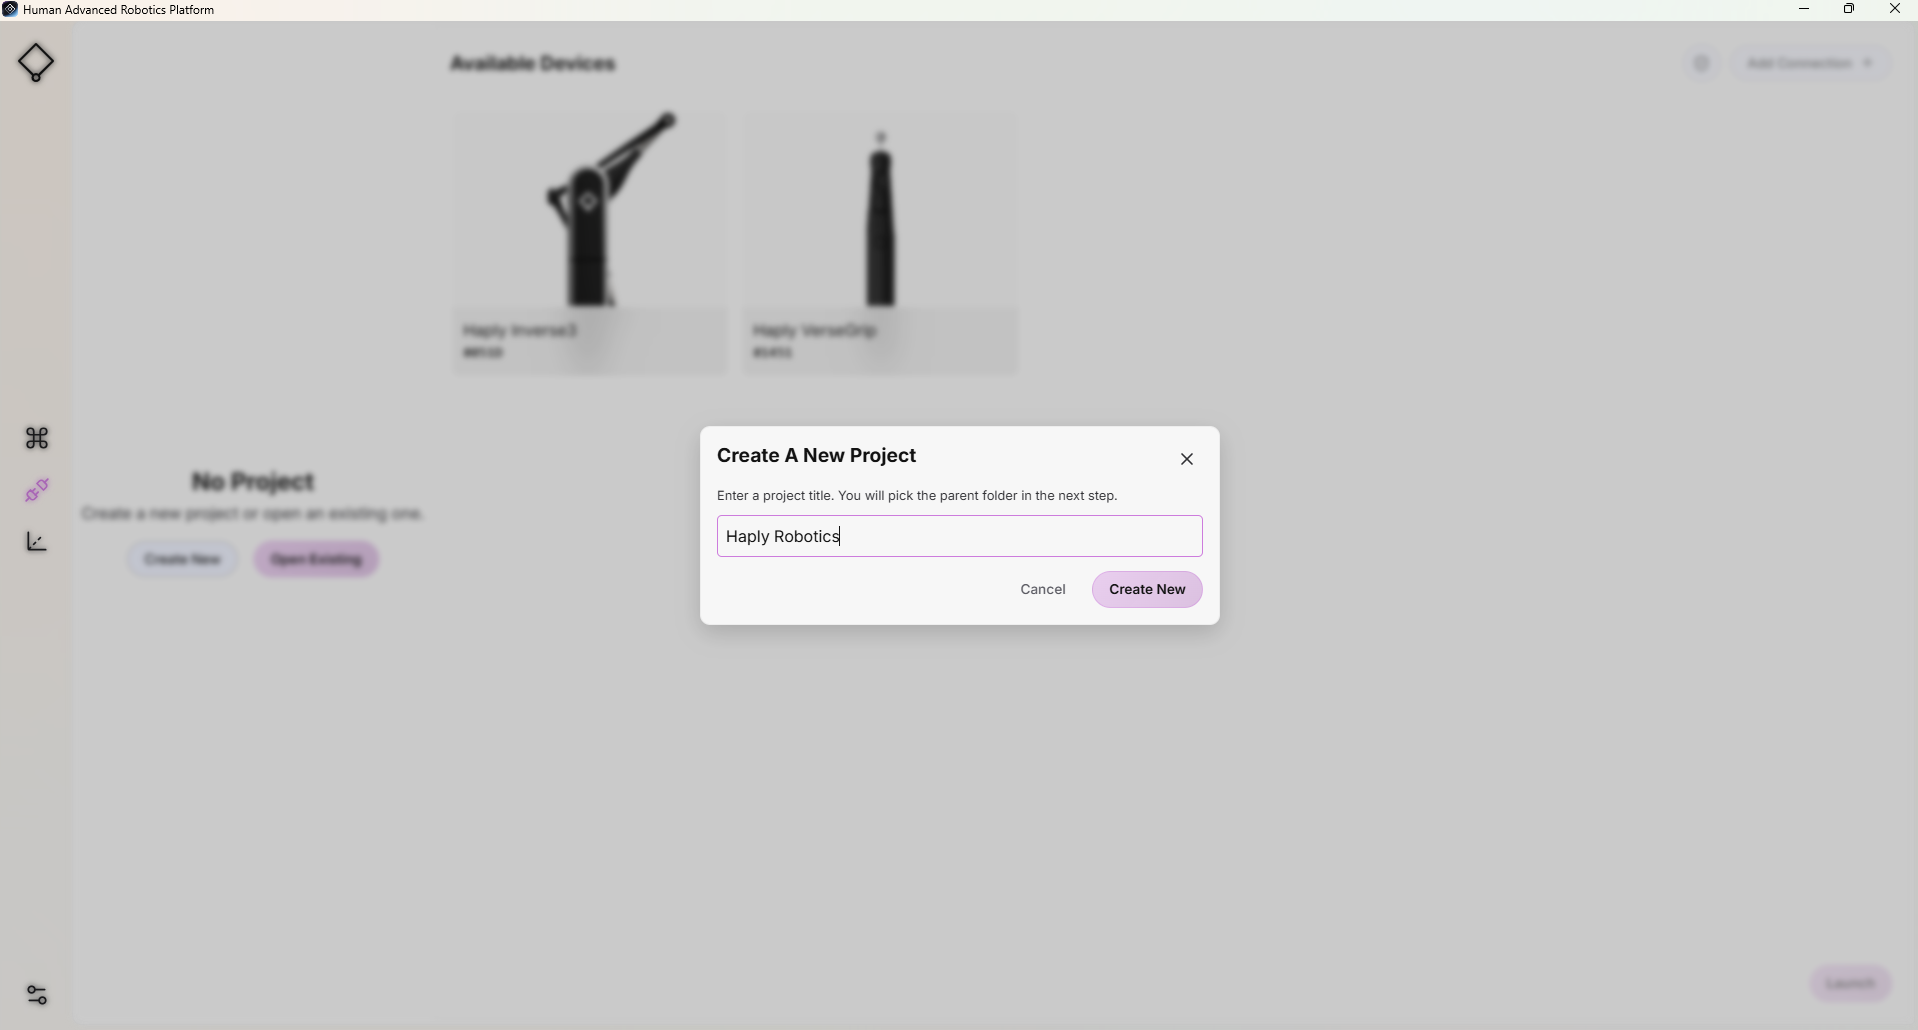
For example, if the project name is MyFirstProject and the selected directory is My Documents, HARP will create the following project folder: My Documents/MyFirstProject/
All project-related files will be stored inside this folder.
Add a Follower
- Click Add Connection at the top of the screen.
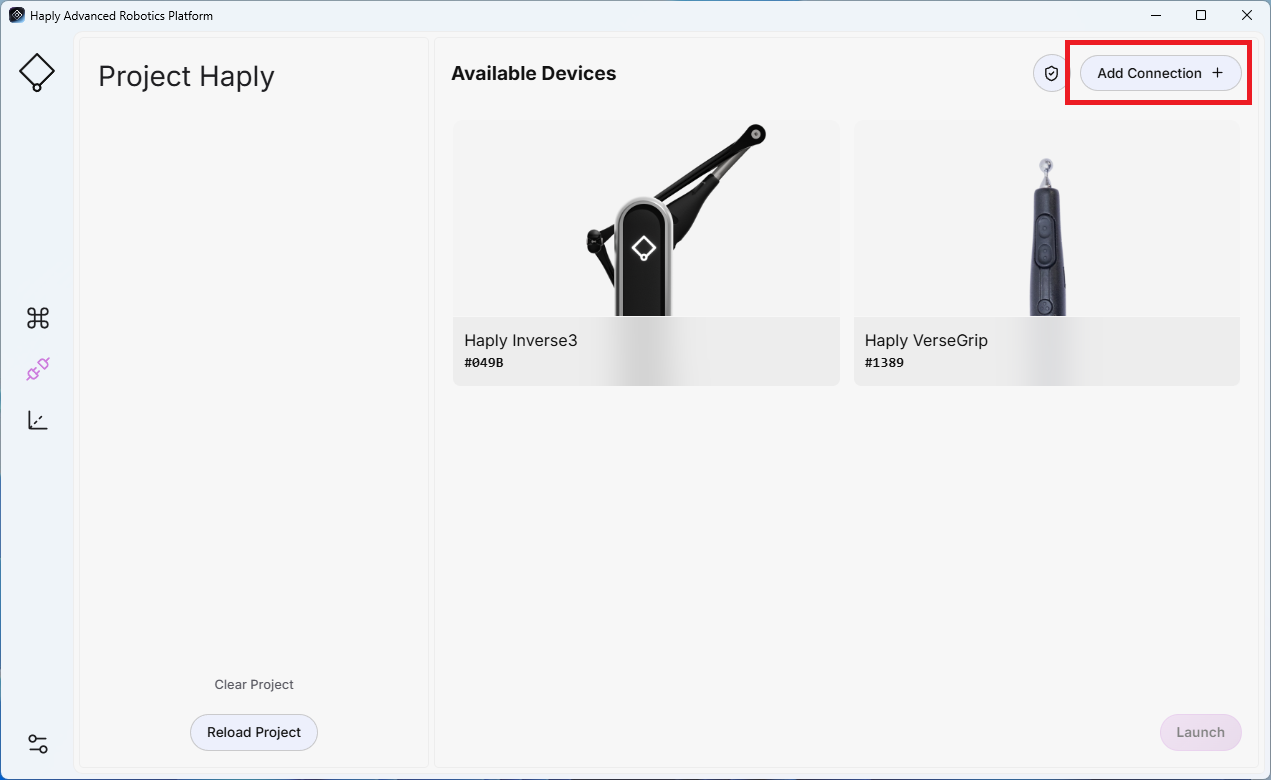
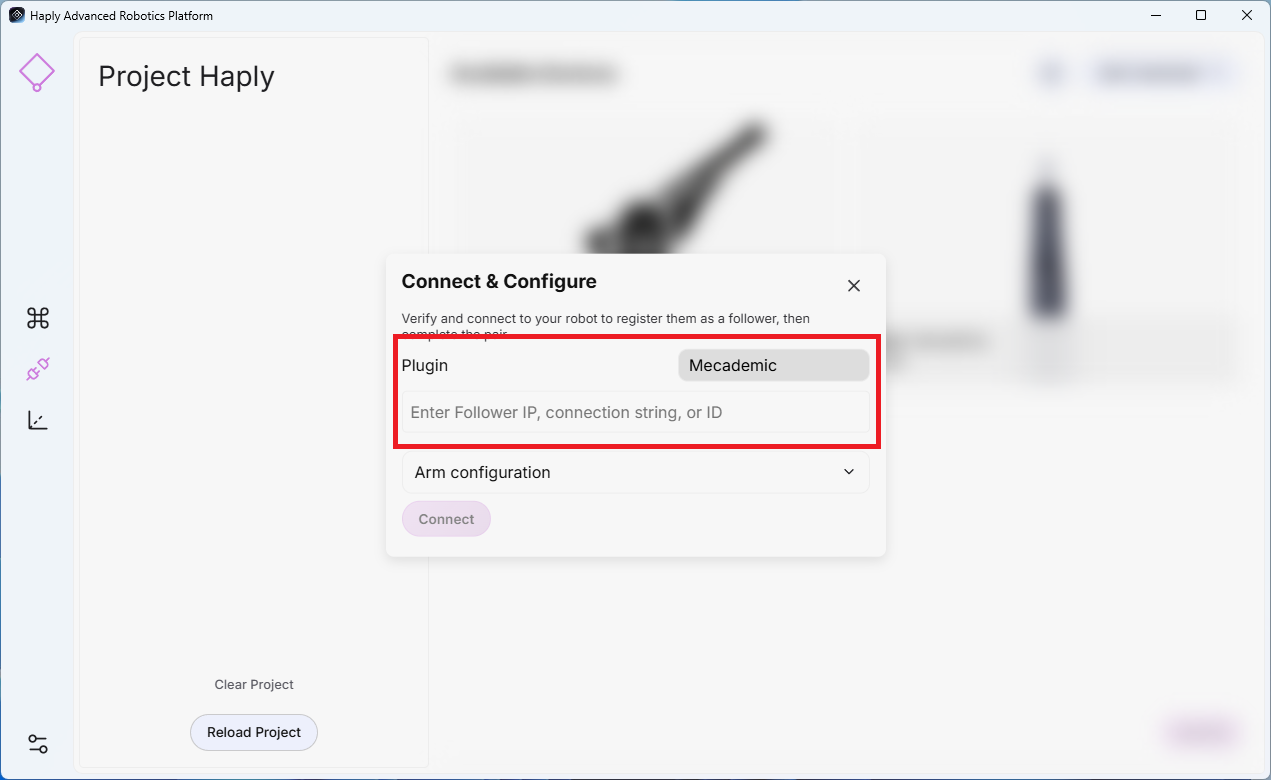
- Choose the correct Plugin for your Robot Arm and enter its IP, Connection String or ID.
-
Arm Configuration (optional): These settings define the robot's initial TCP pose and motion parameters before starting teleoperation.
- Orientation (degrees): Defines the desired TCP orientation.
- Position Offsets (meters): Defines the desired TCP position offset.
- Velocity (%): Sets the robot's maximum allowed motion speed.
- Allowed to Move: When set to Yes, HARP allows the robot to move to the configured pose after the connection is established.
-
Click Connect.
Add an End-Effector
End effectors are associated with their parent follower device. Connect and configure the robot arm first, then add the corresponding end-effector connection.
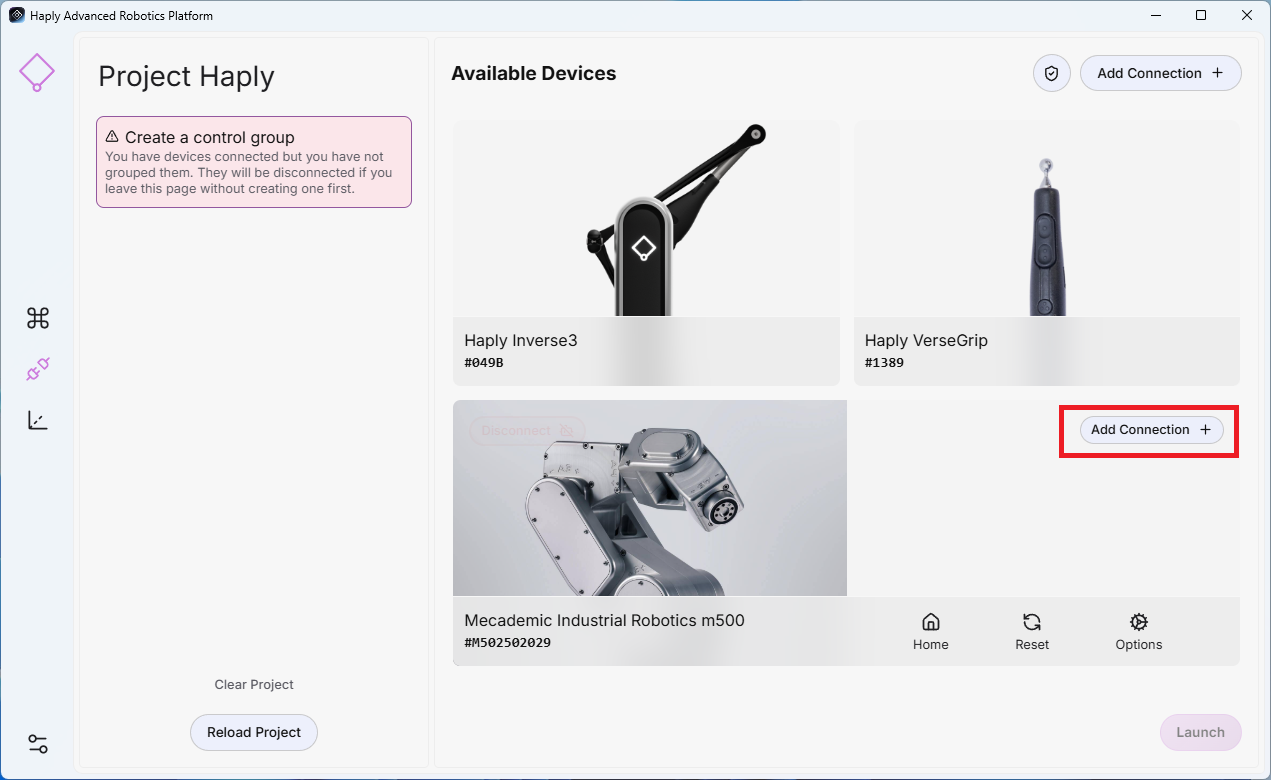
- After adding your robot connection, select Add Connection in the Parent robot where the end-effector is connected.
- Select Plugin: Choose the plugin named for your gripper.
- Address: Enter the device’s IP address or COM port (e.g., COM11).
- Click Connect.
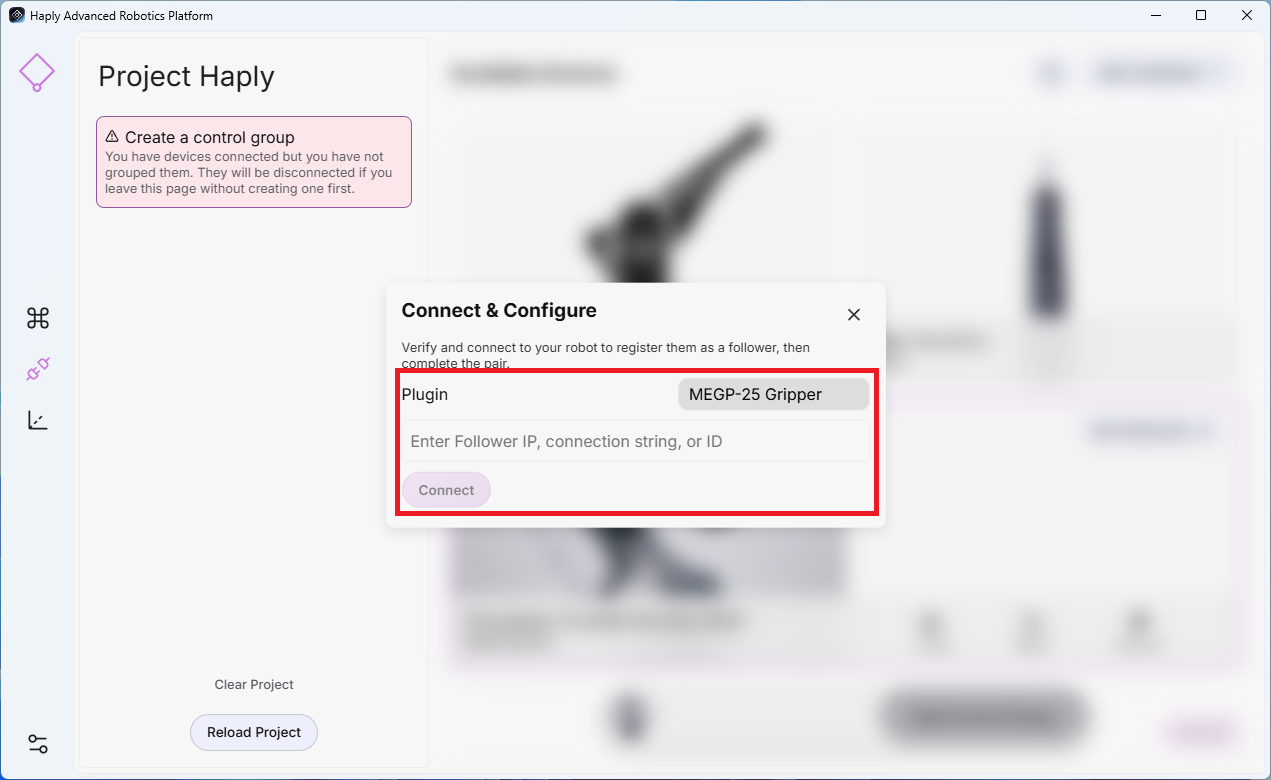
HARP currently supports Mecademic end effectors, Robotiq grippers, and Bota F/T sensors for Universal Robots.
- For Mecademic end effectors, use the same IP address as the connected Mecademic robot.
- For an external Robotiq gripper or Bota F/T sensor, configure the device using its own unique IP address.
Create a Control Group
- On the Connections screen, select each device you want to include in the Control Group.
- Click Add Control Group at the bottom of the page.
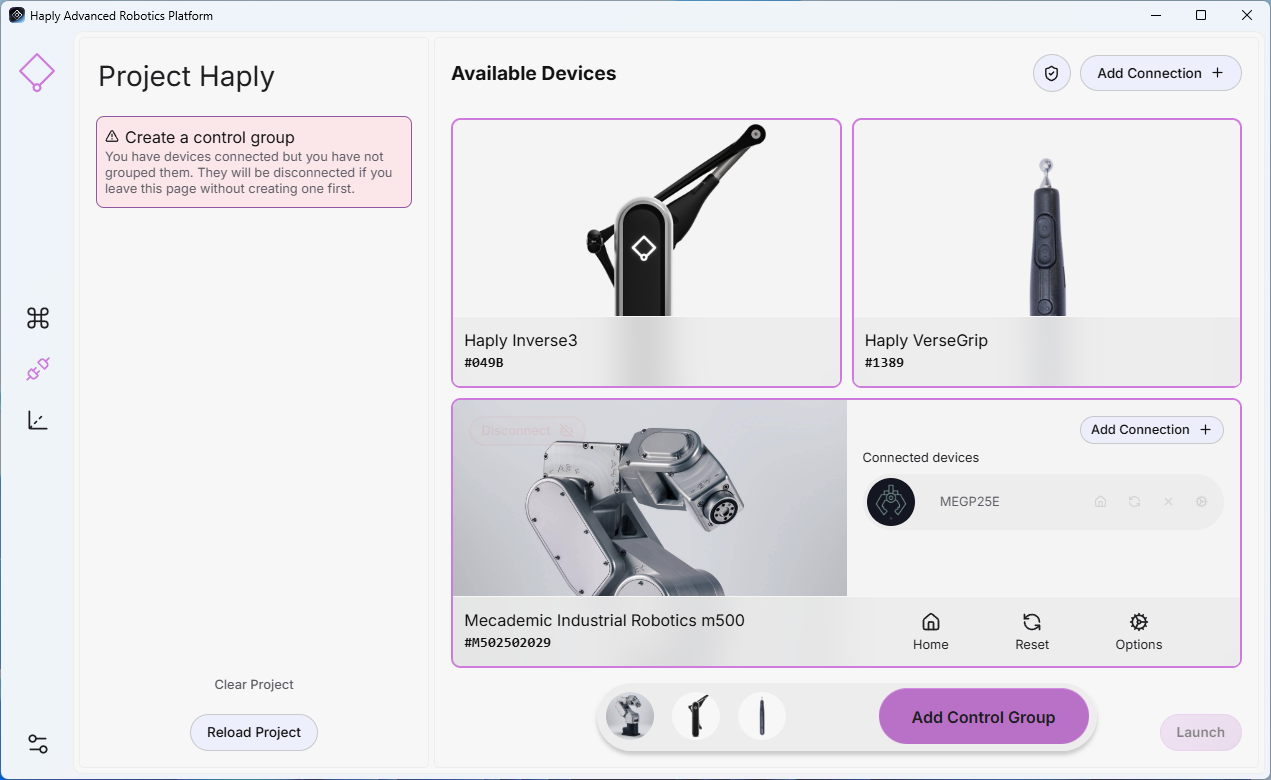
- The new Control Group will appear in the left-side panel and will be saved as part of the current project.
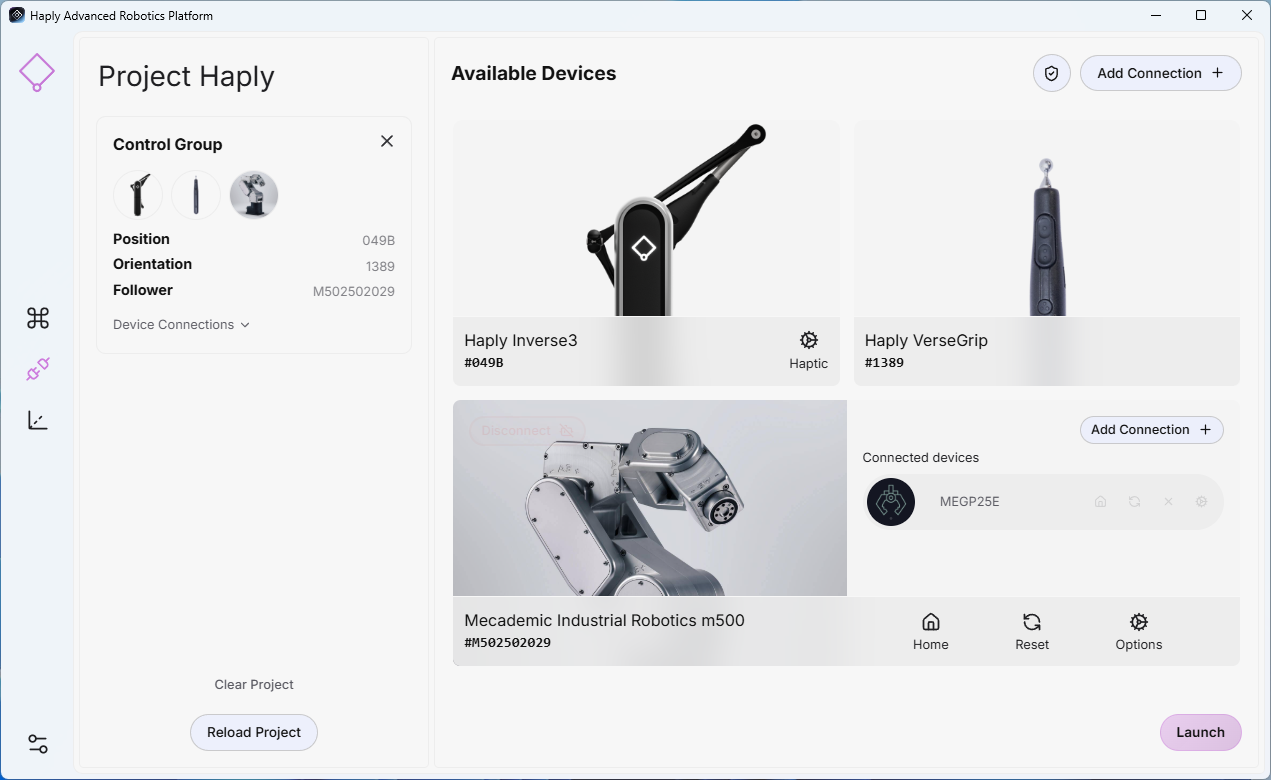
After connecting a new device, verify correct motion direction and speed at low speed with the cell clear of people and equipment.
Launch Teleoperation
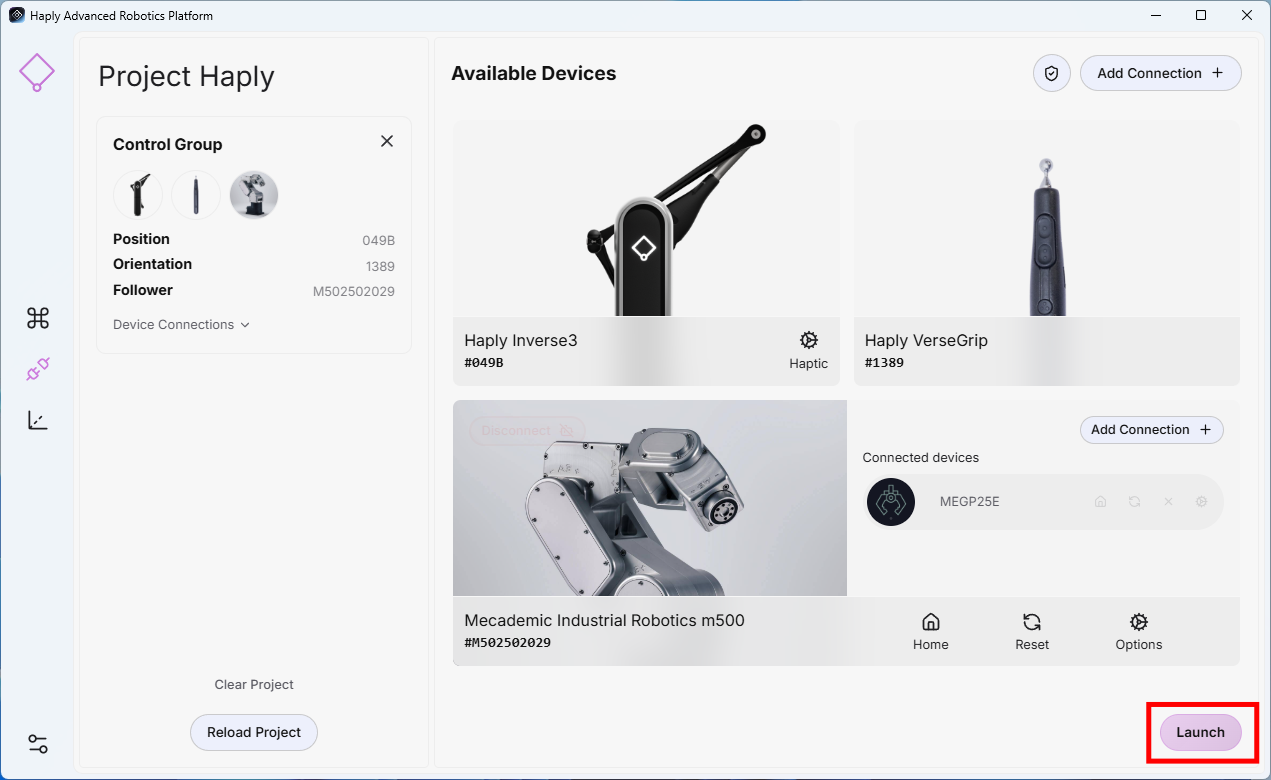
Once the Control Group is configured and all required devices are connected, click Launch in the bottom-right corner to start teleoperation.