Getting started with HARP
(human advanced robotics platform)
This article provides instructions on basic operation and setup of HARP. By the end, you will be able to tele-operate a robot connected to your system.
Before we start
If you haven't already setup your Inverse 3 and VerseGrip stylus check out the Getting started with the Inverse3 and Getting started with the VerseGrip Stylus guides.
Installation of HARP
After downloading HARP, run the installer. The process is straight forward and will launch the application when complete.
TODO - add harp logo
License Validation
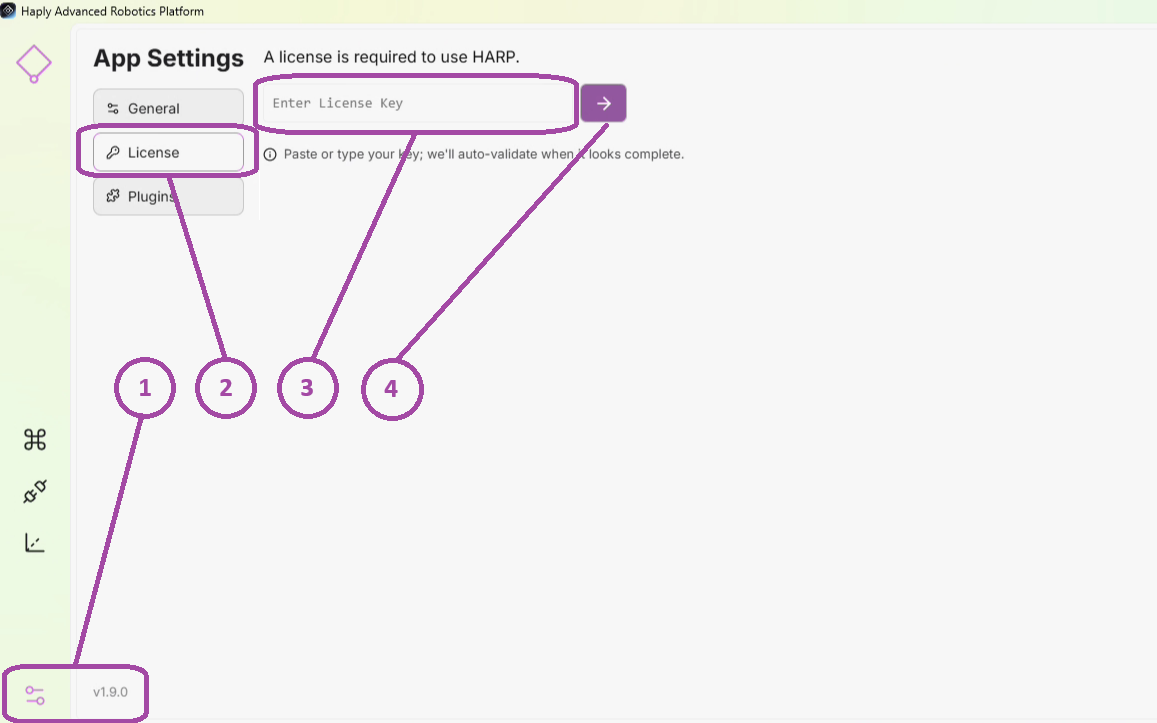
When HARP loads, (1) go to settings and (2) select the License menu list. (3) Enter your license key and (4) Click to validate the license
Create a project
Start by creating a new project. Name the project and select the directory the proejct will be placed in.

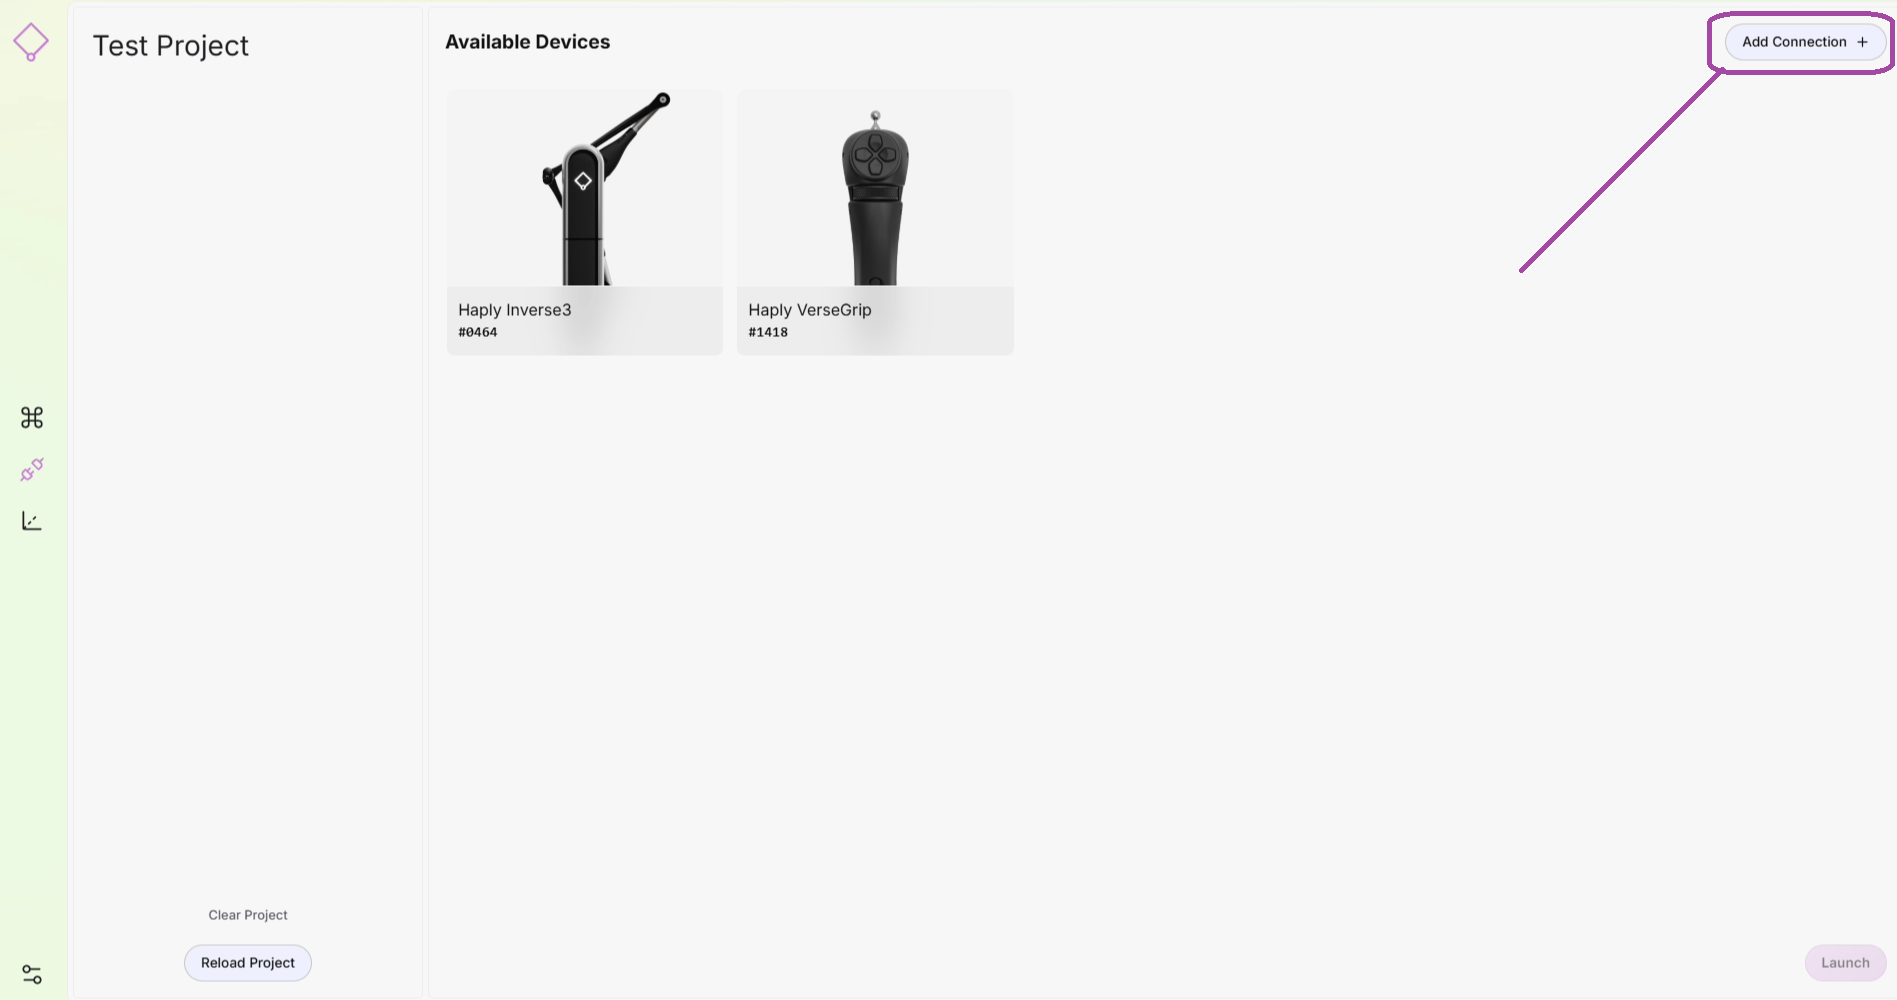
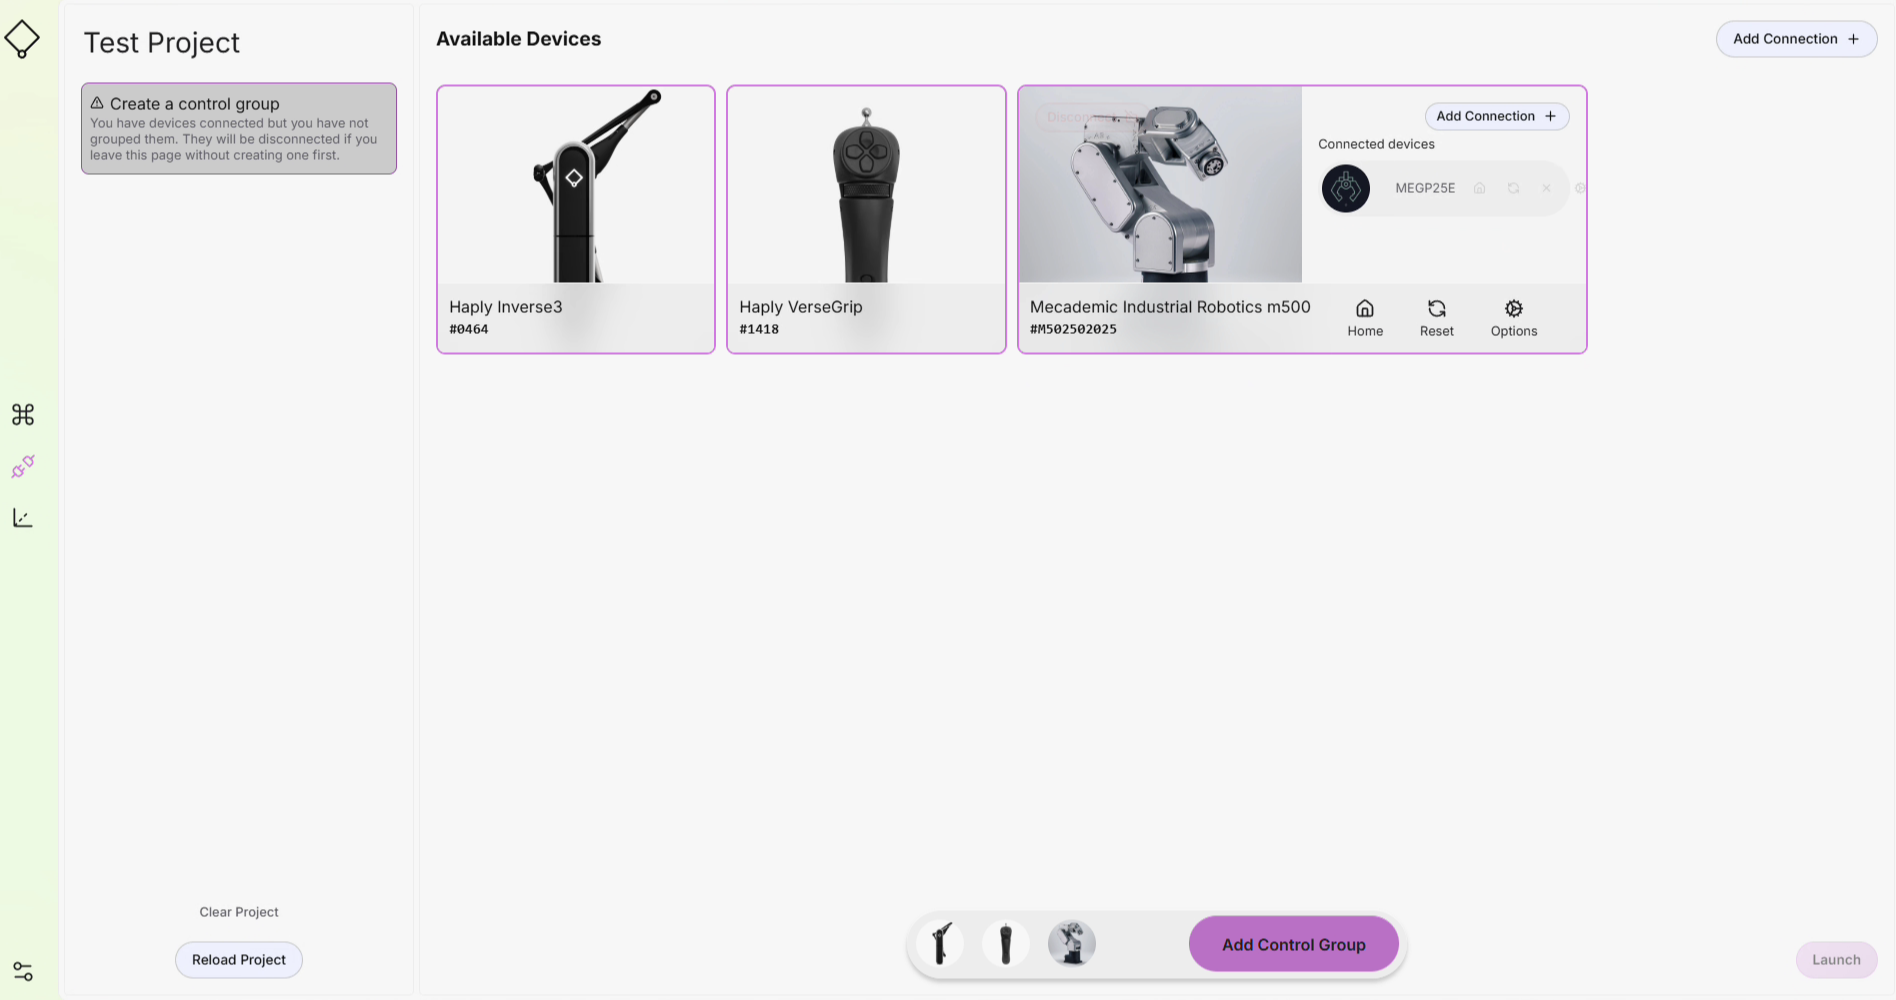
Connecting Devices
Leader devices
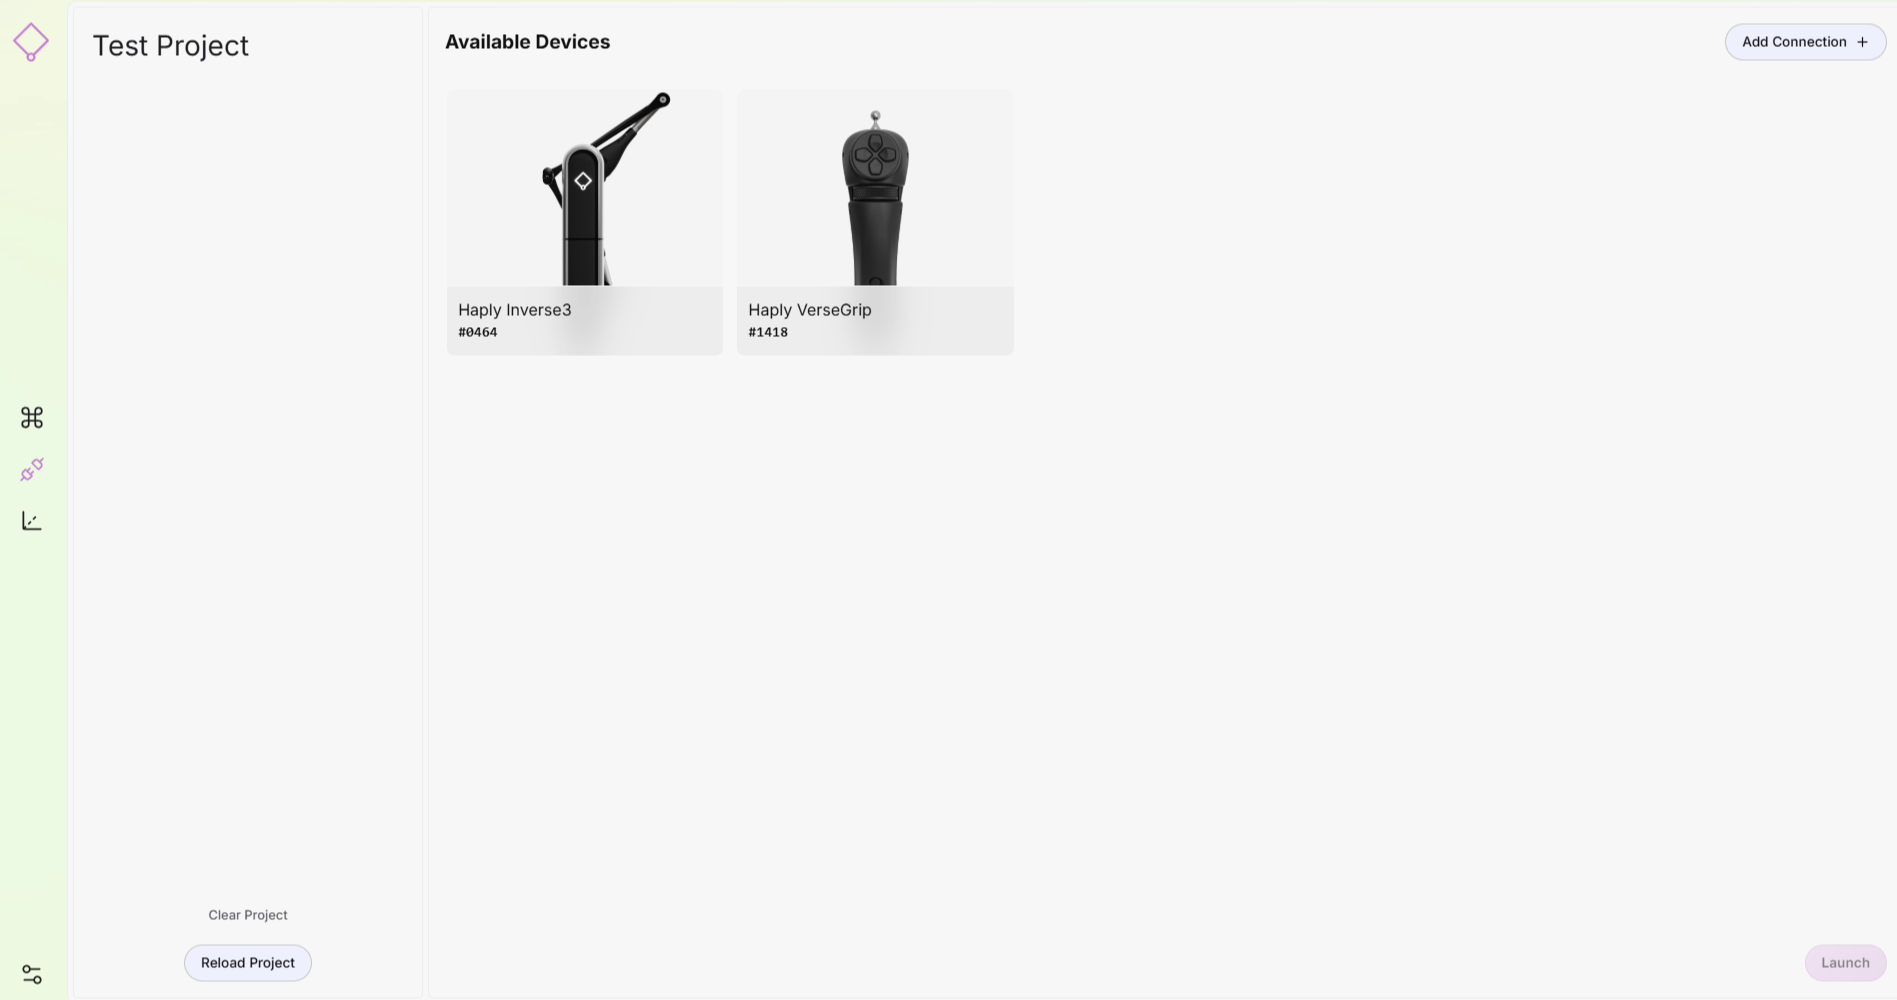
Make sure the Leader devices are connected. You should see the Inverse 3 and VerseGrip on the screen. If you don't see one of your devices, Check the power and ensure the USB dongle for the VerseGrip is connected to the PC.
Follower devices
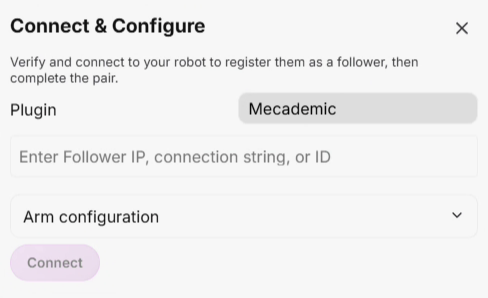
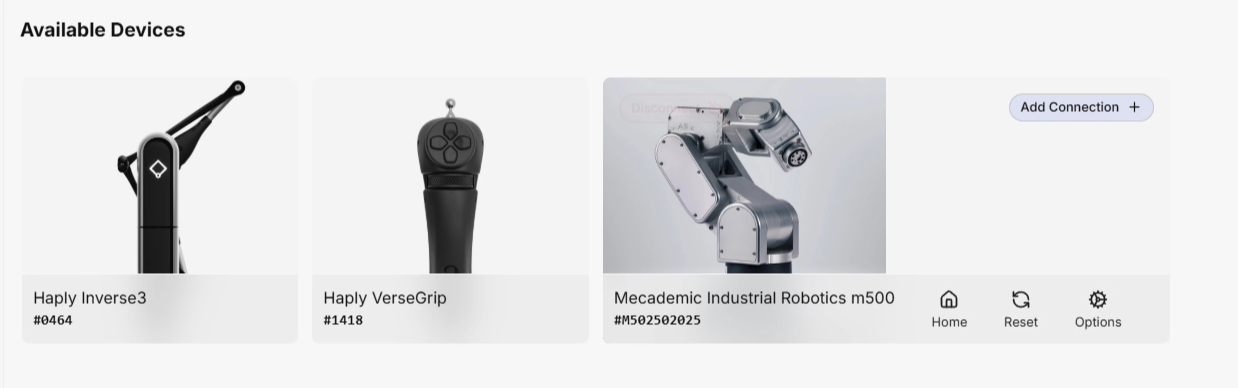
To connect our follower devices, Add Connection lets us connect to robots, force/torque sensors and end-effectors.
Starting with the robot arm, select the robot from the drop down list and enter the connection string. Press connect
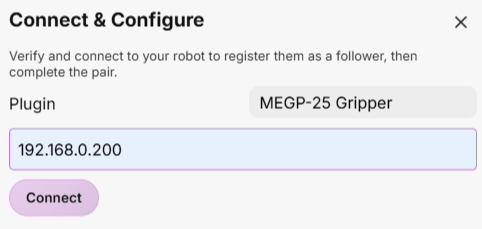
Add a gripper, click Add Connection in the connected robot tile.
Select an end-effector from the drop down menu and enter the connection string. Press connect.
Now that your devices are powered on and connected, lets create a control group. Click on each of the device tiles you want in your control group. They will collect at the bottom, when you have them selected, press the Add Control Group button.
You will see the control group in the project pane on the left side.
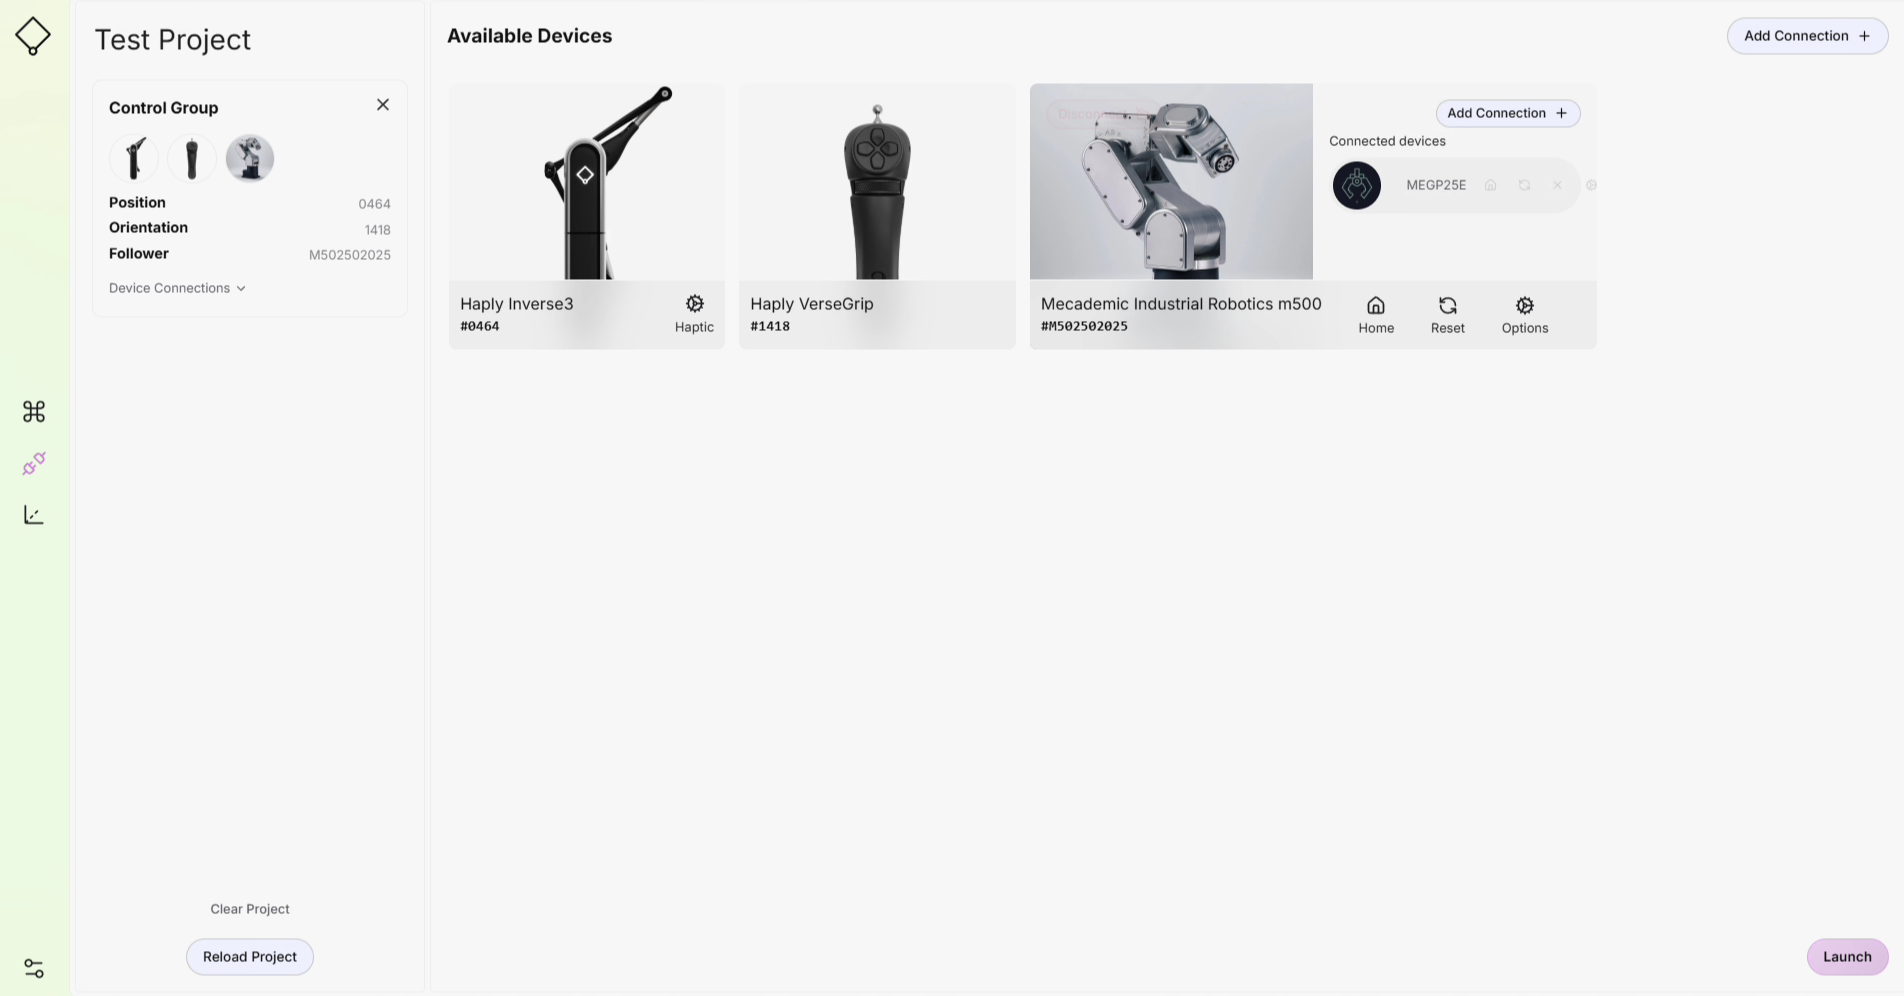
You've successfully connected everything, press the Launch button to jump into the control screen where we will be able to move the robot

Tele-Operate
Right now you have no limits set, no boundaries. Be safe, go slow and understand how the system works before moving to do any serious control work.
STOP button (bottom right), allows user to stop the robot from motion until RESET is pressed. (The ESC key also stops the robot)
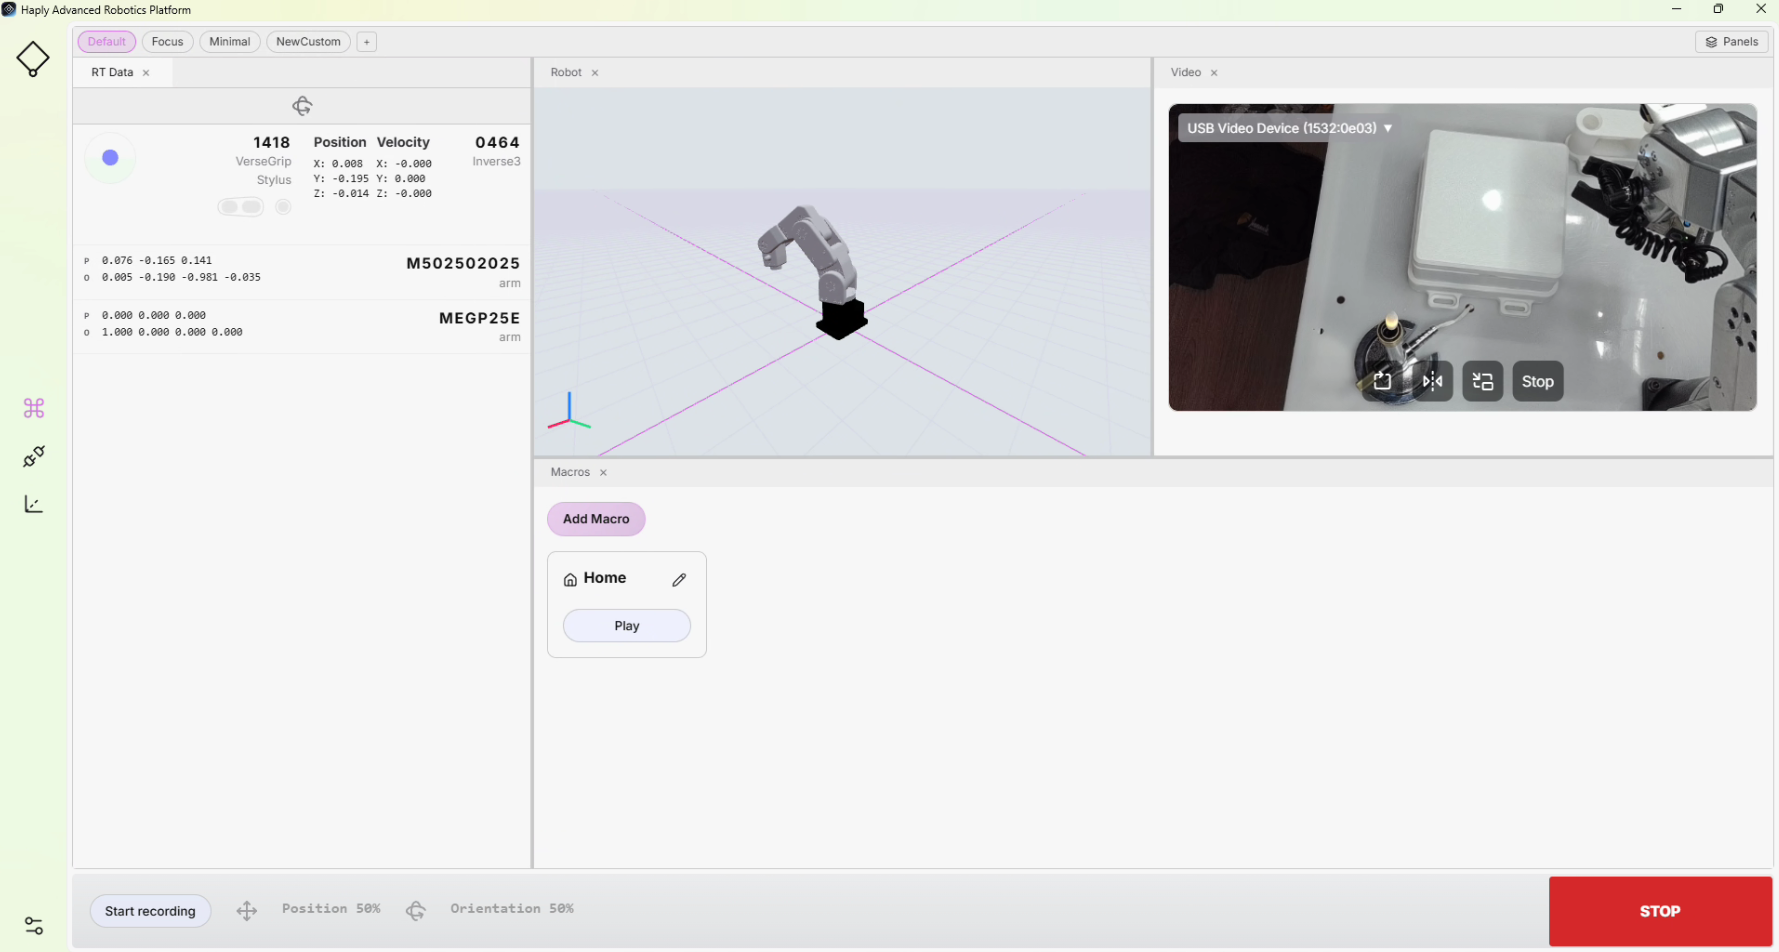
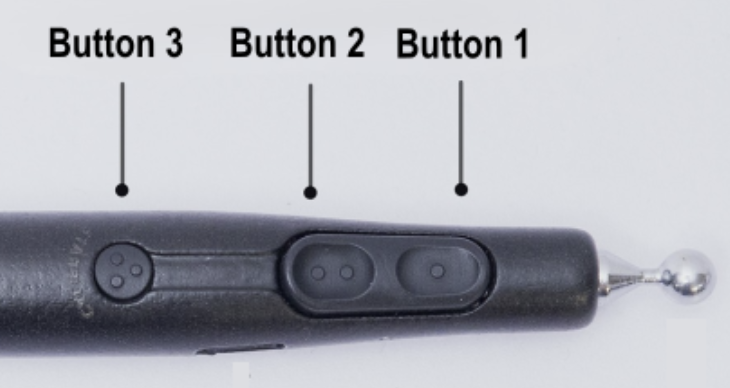
The VerseGrip uses Button 1 for the Clutch.
- Clutch NOT pressed — You can move the device freely without the robot moving.
- Clutch Pressed — Robot moves as the Inverse 3 moves.