6. Command Screen
The Command screen is where you’ll spend most of your time with HARP during teleoperation. It brings together:
- Session Information
- Camera Feeds
- Event Stream
- Macros
- Command Bar (stop/recording/input scaling)
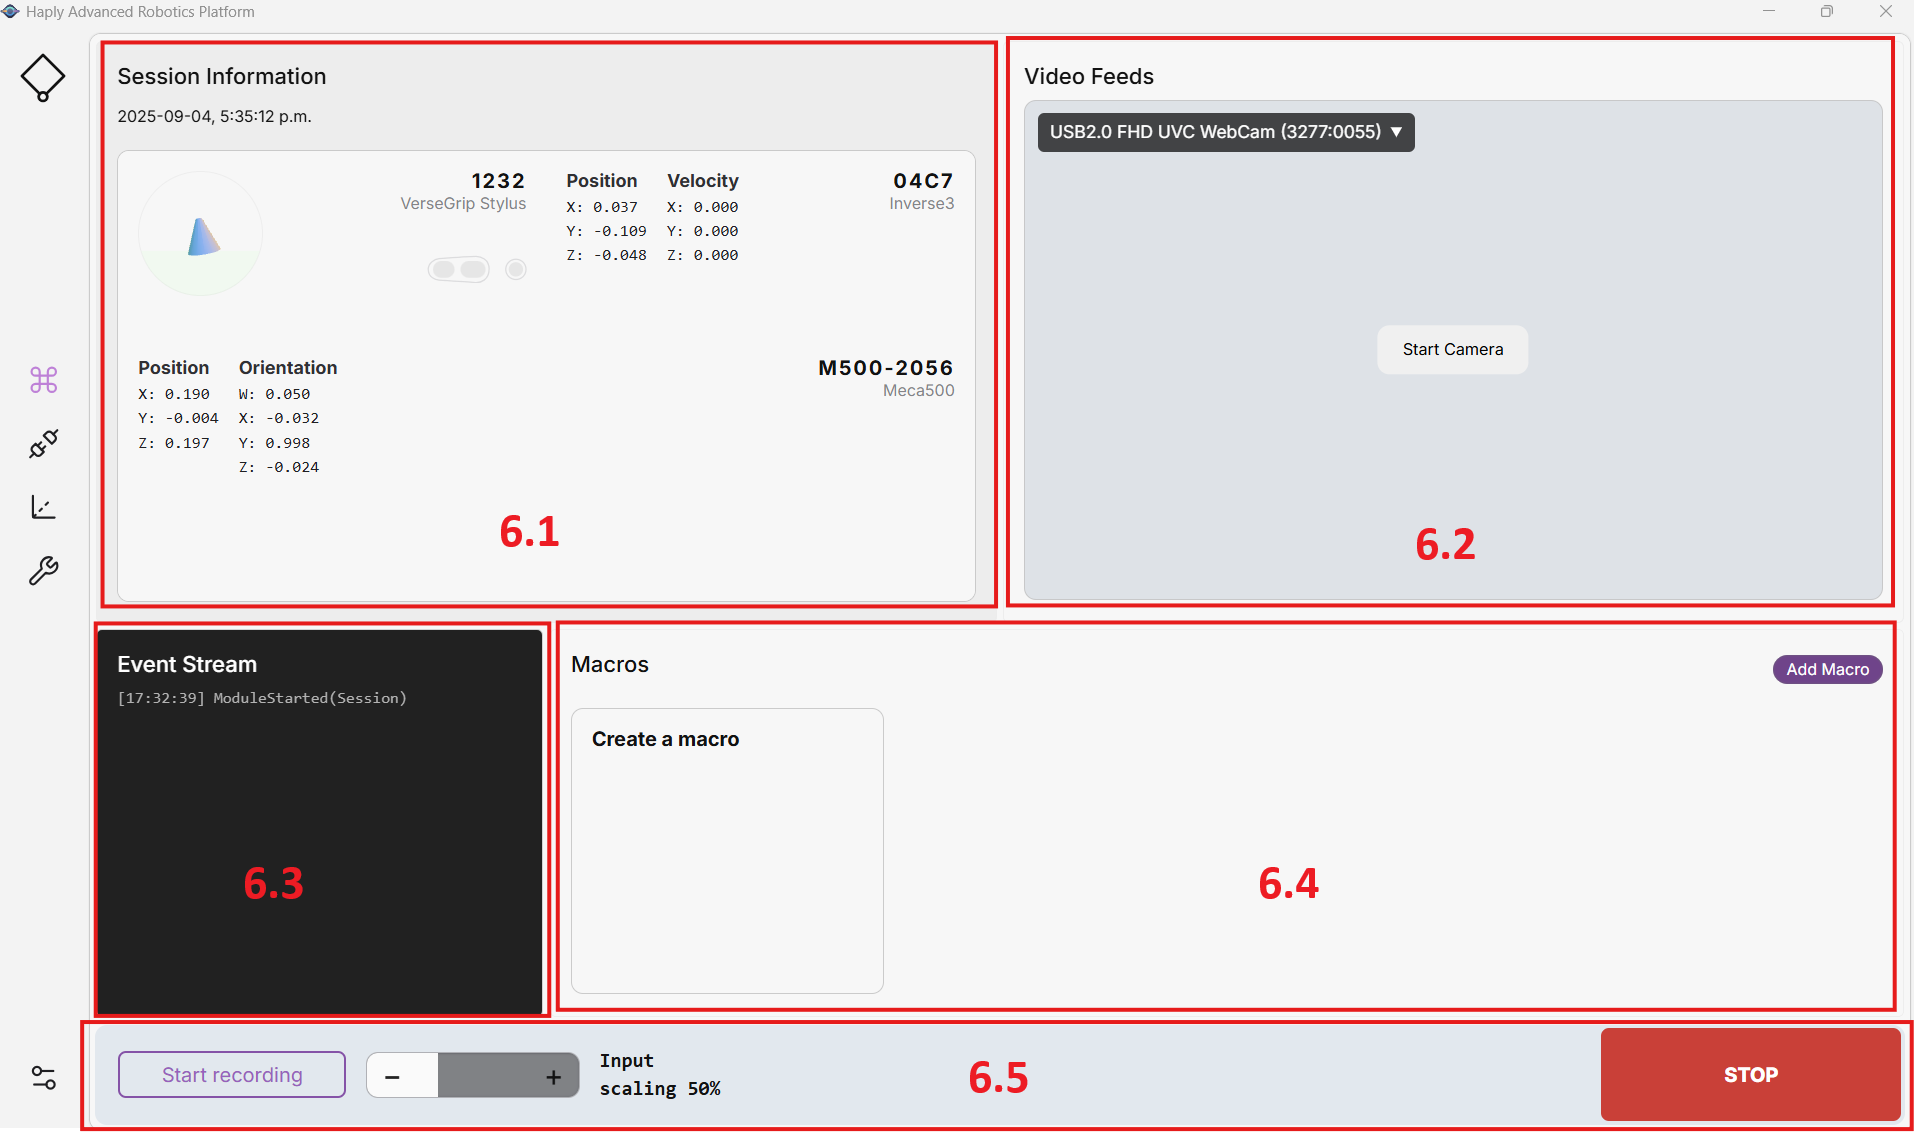
6.1 Session Information
This panel presents live telemetry for both the leader (your Haply handle/input) and the follower (robot):
- Handle Orientation & Buttons — Live orientation of the wireless handle and which buttons (if any) are pressed. Information of the orientation lock Enabled/Disabled
- Hover: Handle/Grip Area — Displays detailed 3D input data (position and velocity).
- Robot Arm State — Live robot position and orientation.
- Hover: Robot Section — Shows joint angles and joint velocities.
- Robot Arm State — Live robot position and orientation.
- Hover: Robot Section — Shows joint angles and joint velocities.
Use this panel to understand what component is moving and where it is located within the workspace at any moment.
6.2 Camera Feeds
The Camera Feeds panel lets you open streams from USB cameras and choose from available devices.
- Start a stream and optionally rotate or flip the image.
- Pop‑out the stream to a separate window to maximize on another display.
6.3 Event Stream
The Event Stream panel provides a running log of session activity, warnings, and errors.
- Use it to diagnose issues, crashes, or unexpected robot behavior.
- Combine with the timestamp in Session Information when reviewing recorded sessions.
6.4 Macros
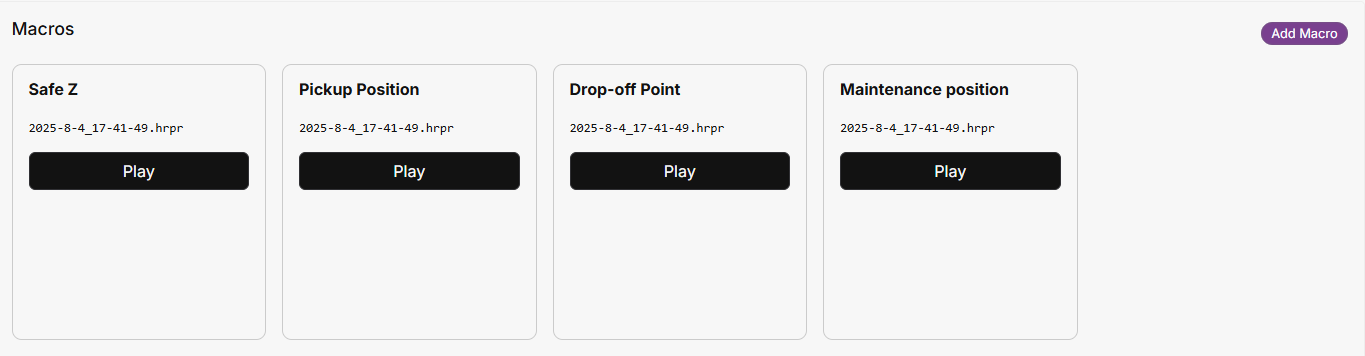
Macros allow you to trigger recorded motions directly from the command screen.
- Click a macro to edit or delete it (e.g., replace its recording or update its name).
- Use Add Macro (right side) to add a new button, this will be saved to the project and loaded each time
- Pressing a macro’s Play button prompts for confirmation before execution (a safety guard against accidental activation).
6.5 Command Bar
Your active session controls:

- Stop — A large Stop button (right side) halts session interactions immediately. Press Esc to trigger Stop from the keyboard.
The ESC key on your keyboard will activate the STOP as well.
- Input Scaling — Sets how far the follower moves relative to the leader:
- 100%: Leader 5 cm → Follower 5 cm
- 50%: Leader 5 cm → Follower 2.5 cm
Begin with a lower input scale when first operating a new robot or tool, then increase as confidence grows.
- Axes Lock — Lock any axis of the Robot by pressing “X”, “Y” and/or “Z” on your keyboard. Lock any orientation axis of the Robot by pressing “Shift + X”, “Shift + Y” and/or “Shift + Z” on your keyboard.

- Recording — Start Recording captures follower data during operation. End Recording saves the recording to your project’s folder structure.
During Recording

- Playing a Macro — Pause button becomes available to pause or end a macro playback. (Pause will not interrupt an immediate set of commands.)
During Macro Playback

At Pause

- Unlock Axes — For safety, if HARP is not the main focus window in teleoperation, the robot axes movement will be locked preventing any movement of the robot.